3D Printing with VHS tape filament

If you have a pile of old VHS tapes collecting dust in your attic or basement that you know you’ll never watch again, either because all of those movies are available on DVD or a streaming service, or because you haven’t had a working VCR since 2003, there might be a way of putting them to good use in another way. With the miles of tape available in just a few cassettes, [Brother] aka [Andrew] shows us how to use that tape as filament for a 3D printer. (Video, embedded below.)

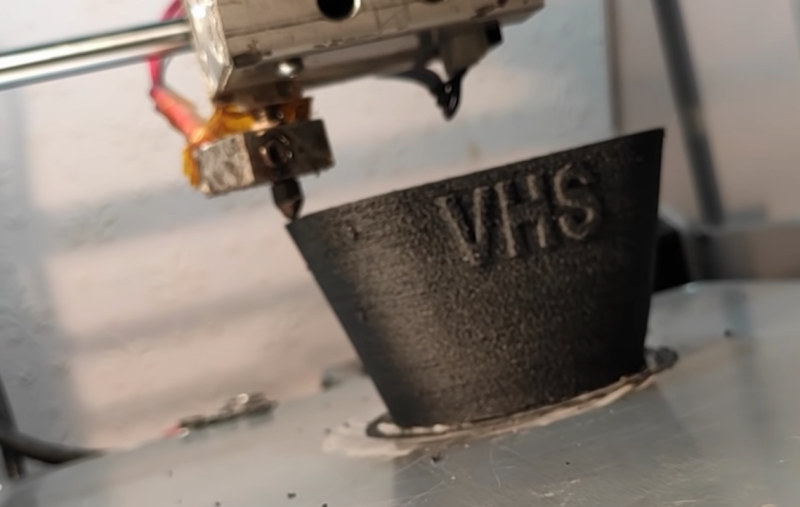
The first step of the build is to actually create the filament. He uses a purpose-built homemade press to spin several tapes into one filament similar to how cotton or flax is spun into yarn. From there the filament is simply fed into the 3D printer and put to work. The tape filament needs to be heated higher than a standard 3D printer filament so he prints at a much slower rate, but the resulting product is indistinguishable from a normal print except for the color. It has some other interesting properties as well, such as retaining its magnetism from the magnetic tape, and being a little more brittle than PET plastic although it seems to be a little stronger.

Read more…

Zack Freedman Built a Tiny RaspberryPi Gaming PC That Plays Crysis!

Miniaturized gaming PCs are all the rage right now and Zack Freedman’s Coccolith is one of the best we’ve seen.

There is a fun trend going on right now with people using single-board computers (SBCs) to create tiny, functional scale models of their full-size desktop gaming PCs. These aren’t capable of reaching anywhere close to the performance of their larger brethren, but that isn’t the goal. The objective is to recreate all of the details as faithfully as possible, all the way down to itty bitty RAM sticks and hard drives in some cases. Zack Freedman wanted to get in on the fad, but took things to the next level by miniaturizing his entire computer setup. The result is “Coccolith,” which is a 1/4 scale model of his main “Monolith” PC, complete with monitor, keyboard, and mouse.

Read more…

Turn A RaspberryPi 4 Into A PLEX Media Server

In this video, we show you how to turn a Raspberry Pi 4 into a PLEX Media Server for Streaming Videos, Movies, Music, and Photos from the Pi4 to any other device that supports PLEX like an Nvidia Shield Amazon Fire stick, Android TV android tablets or phones and even iPads and iPhones. This method is pretty simple and along with your Raspberry Pi PLEX media server, you also have access to a full desktop operating system Ubuntu 20.10 or higher.

Arduino-based machine makes cutting and stripping wires easy

If you need to strip a wire or two, that’s easy enough. However, what if you need tens or hundreds of wires stripped to the exact same length? Such a task would quickly become tedious, but with Mr Innovative’s Arduino Nano-based machine all you have to do it pop in a few numbers and it takes care of the rest!

The automated device uses a 3D printer-like stepper mechanism to feed wire though a flexible length of tubing, which comes out on the other side positioned under a wire stripper. A servo is employed to aim the tubing and wire at either the cutting or stripping portion of the tool, which clamps down via a stepper and linkage setup. User interface consists of a 2.8″ touchscreen, allowing one to define the wire and stripped lengths, as well as how many individual wires are required.

Read more…

Inside a cheap set of eBay digital calipers

For such a lightweight plastic measuring device, the resolution of 0.1mm or 0.01″ and repeatability is quite astonishing. Whilst not being suited to a professional machinist, these units are ideal for ordinary measurements, including designing 3D printed components.

It should be noted that the quiescent current of these devices is around 18uA, even when off (the display goes off until movement is detected). Some users are reporting a very short battery life, but a typical 100mAh (0.1Ah) button cell should be able to supply 0.00002A for a very long time. (Theoretically 100’s of days.)

Hackboard 2 Is a $140 Windows 10 Pro Single-Board Computer

The Raspberry Pi continues to be the most-popular choice for single-board computers, especially considering the very low price point. But what if you want a single-board computer capable of running Windows 10? The Hackboard 2 offers just that for a surprisingly low price.

Hackboard 2 was created by a team spread across Austin, London, and Shezhen. As The Hackboard website explains, the idea was formed very early in the coronavirus pandemic when Quantum Engineering CEO Mike Callow came up with the idea of “creating a small, low-cost, Windows-powered and Intel-based computer for children, parents, and educators who wouldn’t normally be able to afford one.”

Read more…

Debra Ansell Is Quickly Becoming the “Go-To” Authority on Great-Looking LED Lighting!

It’s almost a guarantee that if you haven’t yet incorporated the ubiquitous WS2812x ‘NeoPixel’ or APA10x ‘DotStar’-style “digital” LEDs into a project, you will no doubt have seen the myriad works of many a maker, ranging from blinking, bedazzling digital jewelry to drive-in scale digital LED video walls.

No matter the form factor, getting these bare LED emitters to look their best can sometimes take quite a bit of work! A range of factors, from ensuring that you have provided an adequate power supply to diffusion of the light emitted from these devices — and everything in between! — means that there is usually a direct trade-off between the amount of thought that goes into the incorporation of these LEDs, and how fantastic the final product looks!

Read more…

DIY Raspberry Pi 4 Desktop Case With OLED Stats Display

In this video, I’ll show you how to make your own Raspberry Pi 4 case which looks like a Mini Desktop Computer. The case houses the Raspberry Pi 4 with an Ice Tower fitted for cooling and has a small OLED display on the front which shows the computer’s IP address as well as some stats on the CPU, memory, and storage usage as well as the CPU temperature. The power, HDMI, and audio ports are accessible on the side and the USB and Ethernet ports are accessible on the front of the case.

If you’d like to build your own case, here is the step by step guide with the 3D print file, side templates, and code – https://www.the-diy-life.com/diy-rasp…

I Finally Got my Atari VCS! (Console Review)

UPDATE: The issues with downloading Vol. 2 have been resolved, at least in my case. I’m fully aware this video may not age well. So, I guess I was at the top of the shipping pallet, because I got my VCS less than 24 hours after they started shipping. I was the first person to post online that I had one, and Atari actually tweeted my photo as a result. This is a bite-sized review of my honest day one experience. I did not get to talk about everything I wanted to, but I did what I could.

Biorhythm Clock using Arduino Nano, RTC, 1602A Display, 74HC595

It’s a biorhythm clock using Arduino Nano A biorhythm is a theoretical process by which the human body and mind are regulated according to set patterns. Biorhythms are usually separated into three distinct groups. The emotional, mental, and physical cycles. Classically, the lengths of these cycles are 28 days, 33 days, and 23 days respectively.