Projects
Various projects I work on
Crackedconsole Game room and work area – WIP
We finally got everything setup, and will be back to work on the PinkPi Pro to finish the build video!
A quick look at the work area.
PinkyPi Sale!
With the popularity of the PinkyPi micro console growing, we are celebrating by cutting the prices of the premade 3D printed cases as well as the DIY parts kits.
Check them out in our shop.
Crackedconsole Web Store
PinkyPi Giveaway!
Be sure to check out our Web Store to buy PinkyPi cases and DIY Kits!

Enter to win your very own PinkyPi Micro Handheld Game Console!
Official Rules:
Contest Ends May 31st 2019 – Winner will be selected and announced June 1st 2019.
Winner will be contacted via Email on their registered Email address from our message forums. They will have 1 week (June 8th) to reply and provide a valid shipping address in the Contiguous United States. If they fail to do so, a new winner will be selected June 9th 2019 and the process will repeat.
Shipping is free.
Only 1 entry per person is allowed.
You must be a resident of the Contiguous United States.
You must be 18 or older to enter.
To Enter:
Like / Share this post / page or Tweet.
Follow us on Instagram, YouTube and or Twitter (Links below).
Join our message forums, and comment on the PinkyPi Giveaway thread on our forums, adding where you followed and shared this.
A random post will be selected from the Forum posts, validated you are following/subscribed and have shared our post.
Product Details:
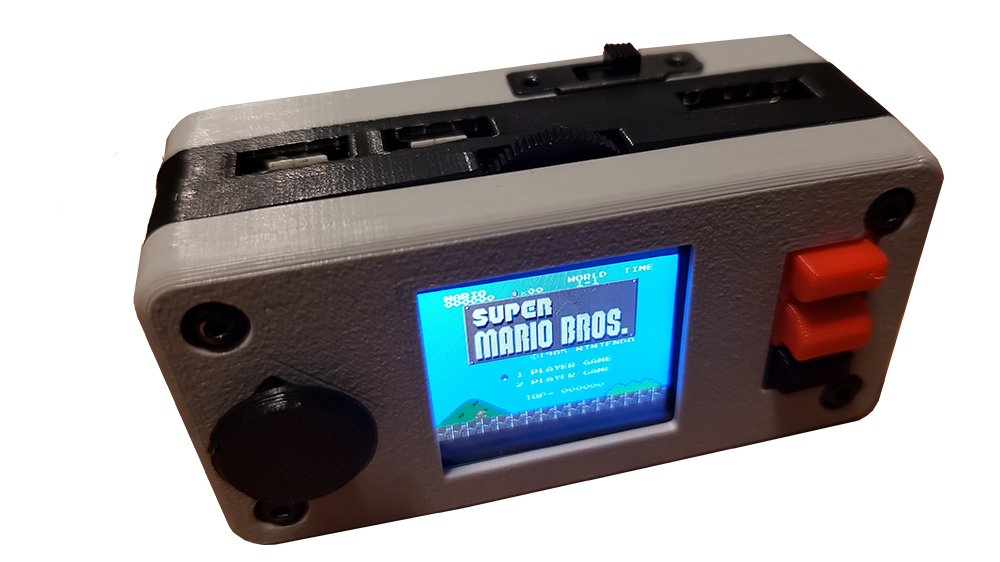
PinkyPi Handheld Game Console, with NES Themed case.
Raspberry Pi Zero W
Waveshare 1.3inch LCD Display hat (240×240)
500mAh battery
32GB MicroSD Card flashed with the PinkPi prebuilt image version 1.0
NO ROMS are included, this is a RetroPie 4.4 based image with graphics drivers/button mapping and themes configured.
Again, NO ROMS are included on this image/device! Do not ask us for ROMs or games, we do not and will not provide these.
**We ship only to the Contiguous United States, shipping will be free to the Winner. Outside of the Continental United States is not eligible for this contest.
No warranty and or hardware guarantee is provided for this item, components are very small and fragile.
This item is not eligible for return,refund or exchange, all transactions are final.
The joystick is very fragile, because of this the joystick top will be shipped detached, and the recipient must gently press fit it into place.
PinkyPi and PinkyPi Pro Official Images – version 1.0
I’ve finally finished the precompiled images for PinkyPi and PinkyPi Pro micro game consoles.
These images are based of RetroPie 4.4 and utilize the fbcp-ili9341 display driver.

PinkyPi 1.3LCD-
PinkyPi prebuilt image, based off RetroPie 4.4
This is for the 1.3inch (240×240) LCD display version.
Using fbcp-ili9341 display driver.
Using RetroGame GPIO controller driver.
Backlight control is enabled – to disable see here.
PinkyPi Pro –
PinkyPi Pro prebuilt image, based off RetroPie 4.4
This is for the Pro version of PinkyPi, 1.5inch screen and more buttons.
Using fbcp-ili9341 display driver.
Using RetroGame GPIO controller driver.
Using PiSNES as default SNES emulator
[download_category category=”pinky_pi_img”]
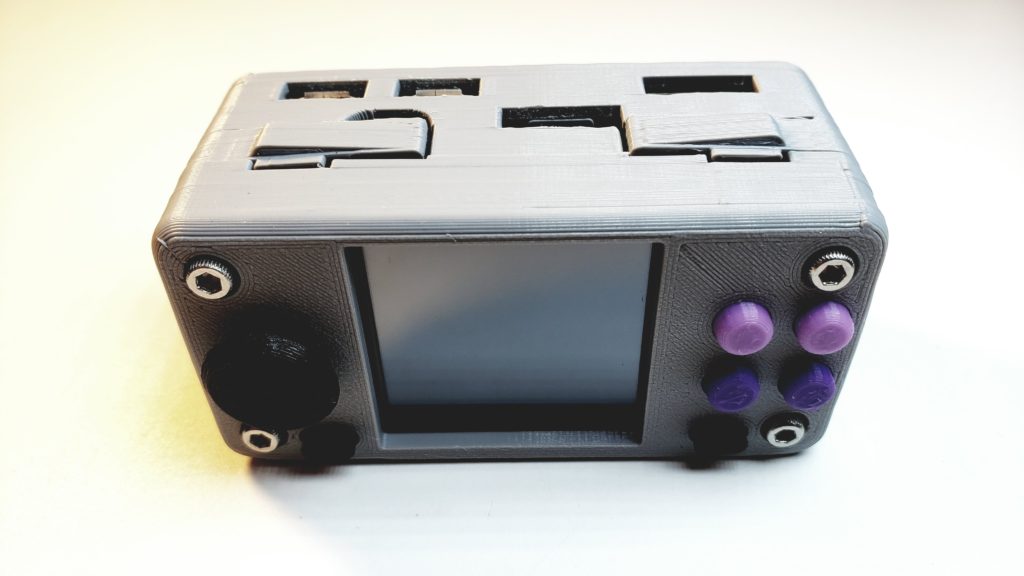
PinkyPi Pro source files and STL files now available on Thingiverse!
I’ve released build 2.0 of PinkyPi Pro onto Thingiverse as the first public release.
PinkyPi Pro is a micro gaming handheld, themed around the SNES style controller / controls. Inlcuding A/B/X/Y, Start/Select and L/R triggers, with a 1.5inch LCD display, built in amp/speaker/charger and battery for portability.
The current build is going to be sporting a 600mAh battery, 100mAh more than the Pinky Pi standard version.
Check out the build log in our forums, and look forward to a full build video, parts kits and other goodies coming soon!
Crackedconsole Store coming online next week!
Crackedconsole web store will be going officially online coming this next week. April 2019!
Our first products will be the following;
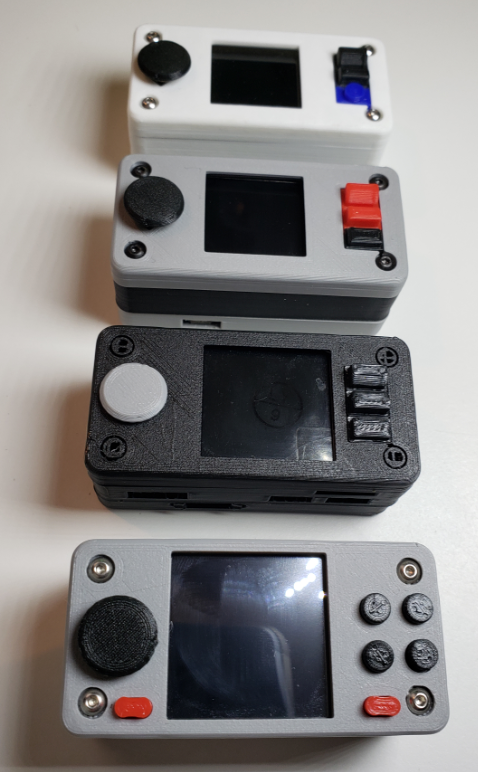
PinkyPi Standard – 3D Printed Case
You can choose between the 1.3inch LCD or the 1.4inch LCD version
Color options currently include – Black,Grey,White,Blue,Red,Purple
PinkyPi Standard Slim – 3D Printed Case
You can choose between the 1.3inch LCD or the 1.4inch LCD version
Color options currently include – Black,Grey,White,Blue,Red,Purple
PinkyPi Standard Button Pack
You can choose between the 1.3inch LCD or the 1.4inch LCD version (match to the case purchased as buttons differ)
Color options currently include – Black,Grey,White,Blue,Red,Purple
PinkyPi Standard Electronics Kit
Battery,Charger,Amp,Speaker,Power Switch, Resistor and Capacitor for audio filter
Screws, standoffs
PinkyPi Standard – Limited Edition 3D Printed NES Themed Case (Case and Buttons)
A Black and Grey case combo
Red and Black button kit
Coming Soon!
PinkyPi Pro Cases and Kits!
Configuring RetroPie for SSH with no keyboard or display.
Accessing your RetroPie project over SSH allows you to configure drivers, software and settings with out having a keyboard or even a screen connected to your Raspberry Pi.
You can enable SSH from the Boot folder of the SD card, first we must put the SD card in our computer and open the Boot folder.

Create a file in this folder called ssh with NO extension (no .txt, no .conf, no extension)
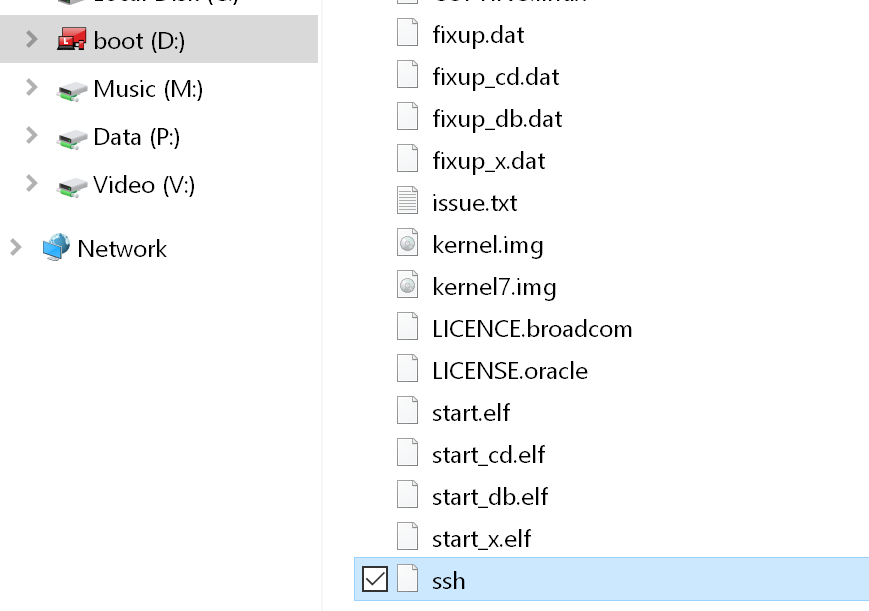
Once this file is created, you can boot your RetroPie Raspberry Pi build and access the device over SSH to do the work and configuration you need to.
If you are a Windows user, be sure to check out PuTTy to access the device over SSH.
The default hostname for Retropie is, retropie
And the default username and password are pi / raspberry
If you would like to setup your WiFi in the same way, check out our WiFi guide.
Configuring RetroPie to connect to WiFi with no keyboard or display.
Looking to connect your RetroPie project to your WiFi, but have no display or keyboard connected? RetroPie allows us to place a file called wpa_supplicant.conf in the boot folder of the SD card.
Connect your SD card to your computer and open the Boot folder.
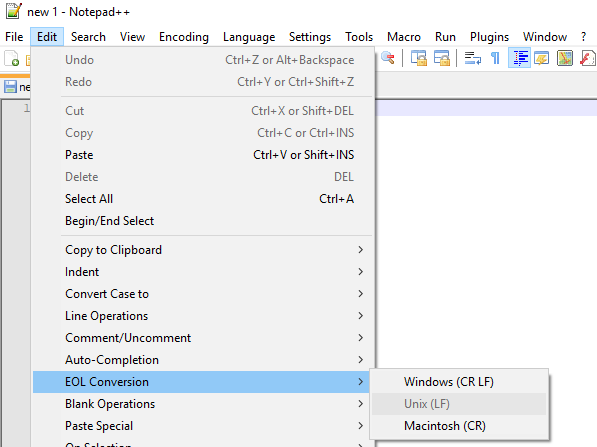
Create a file called wpa_supplicant.conf in this folder, I use notepad++ to assure compatibility with the RetroPie OS.
For best results, set the End Of Line conversion to Unix (LF)
And add the following text, be sure to modify the settings to match your network and location.
country=US
ctrl_interface=DIR=/var/run/wpa_supplicant GROUP=netdev
update_config=1

# RETROPIE CONFIG START
network={
    ssid="Your-network-name"
    psk="Your-network-password"
}
# RETROPIE CONFIG END
Save this file and your ReptroPie device should now boot and connect to your network.
By default the device name is retropie , and you should be able to locate this on your network.
This is assuming you are using WPA and RetroPie 4.1 or higher for your build.
For more RetroPie network options, check out the Official RetroPie WiFi Setup Guide
If you wish to configure SSH on your device as well, Check out this guide.
Manually updating Plex on FreeNAS, including PlexPass versions. -PMS_Updater.sh
Are you running Plex Media Server on FreeNAS as a plugin, but don’t like waiting for the updates from FreeNAS?
PMS_Updater for FreeNAS is exactly what you need!
PMS_Updated allows you to update the FreeNAS Plex install from CLI with out waiting for the plugin updates from the devs, the updater will connect to your specified jail, download the most recent version of Plex and run the update if needed.
To do so, first we need to either access our FreeNAS console, or login via SSH. (for Windows users, check out Putty)
Once logged into your FreeNAS server, you want to determine what Jail number your Plex server is installed in, to do so execute the following
jls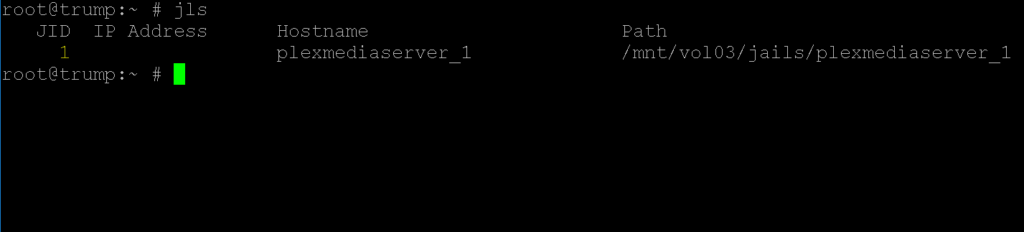
You will get an output of Jails installed, choose your Plex Server. In this example mine is 1.
Our next line with log into that Jail to update Plex, so be sure to use the number from the jls command above.
jexec 1 cshThe first time you run this, you may need to install the following.
pkg install ca_root_nss
pkg install wget
pkg install perl5
Once in the Jail, we can download the PMS_Update script
fetch -o PMS_Updater.sh https://raw.githubusercontent.com/mstinaff/PMS_Updater/master/PMS_Updater.shOr for PlexPass use
fetch -o PMS_Updater.sh https://raw.githubusercontent.com/luluhoc/PMS_Updater/master/PMS_UpdaterPLEXPASS.shAfter the appropriate updater is downloaded, make sure to modify the permissions for the file to execute correctly.
chmod 755 PMS_Updater.shAnd then execute the script.
./PMS_Updater.sh -vv -aYou should now be on the latest version of Plex, you may need to start your Plex Server in the FreeNAS plugins page.
For a list of known issues and bugs, please check the Issues Page from the Author of this script.
At the time of writing this article (3/23/19), there are 2 known bugs with the current release.
Forcing an update when all else fails
A few times the script above has failed me, to get around I still execute the jexec for the jail I wish to update.
jexec 1
fetch -o PMS_Updater.sh https://raw.githubusercontent.com/luluhoc/PMS_Updater/master/PMS_UpdaterPLEXPASS.sh
chmod 755 PMS_Updater.sh
And I then use WinSCP to copy the install files over to the plex jail location. The installers can be downloaded from Plex.tv and choosing FreeBSD.
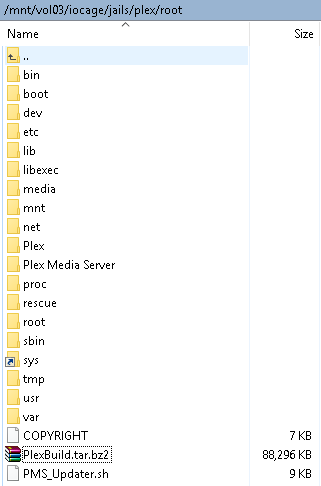
And then execute the following command. (Just be sure to name the downloaded Plex server files to PlexBuild.tar.bz2)
./PMS_Updater.sh -l PlexBuild.tar.bz2 -vv -a