Looking to connect your RetroPie project to your WiFi, but have no display or keyboard connected? RetroPie allows us to place a file called wpa_supplicant.conf in the boot folder of the SD card.
Connect your SD card to your computer and open the Boot folder.

Create a file called wpa_supplicant.conf in this folder, I use notepad++ to assure compatibility with the RetroPie OS.
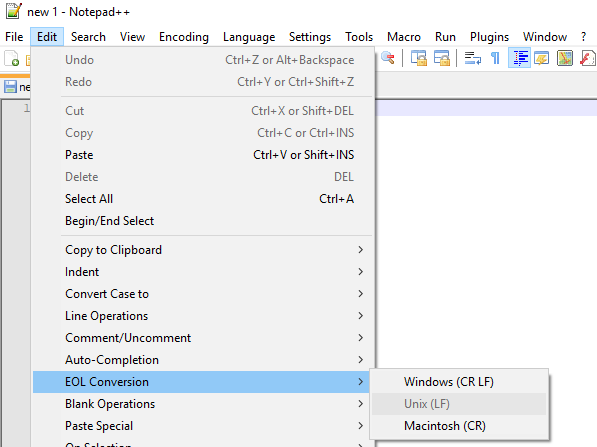
For best results, set the End Of Line conversion to Unix (LF)
And add the following text, be sure to modify the settings to match your network and location.
country=US
ctrl_interface=DIR=/var/run/wpa_supplicant GROUP=netdev
update_config=1

# RETROPIE CONFIG START
network={
    ssid="Your-network-name"
    psk="Your-network-password"
}
# RETROPIE CONFIG END
Save this file and your ReptroPie device should now boot and connect to your network.
By default the device name is retropie , and you should be able to locate this on your network.
This is assuming you are using WPA and RetroPie 4.1 or higher for your build.
For more RetroPie network options, check out the Official RetroPie WiFi Setup Guide
If you wish to configure SSH on your device as well, Check out this guide.