Researchers Reveal Optimizations to Boost Battery Life in Arduino Uno, ATmega328P-Based Data Loggers

With the addition of a MOSFET and some tweaks to the program code an Arduino Uno can log every two seconds for a year on a 2,400mAh battery.

A pair of researchers from Newcastle University have published a paper investigating optimizations to boost battery life in Microchip ATmega328P-based, Arduino-compatible data loggers — by tweaking SD card save operations.

“As part of a university project, I needed to look into how to make the Arduino/ATmega328P last on a couple of AA batteries for over a year,” first author Luke J. Bradley explains. “After doing a lot of digging through the datasheet and reading multiple online forums, I discovered that there are lots of tips and tricks out there but no one has made a standard method for creating a low power data logger. As such, I decided to write and publish a paper based on this. The paper shows exactly how to create a data logger using an SD card and an RTC as well as little tips and tricks within the code to help minimize power consumption. I hope it helps other people in their projects!”


Read more…

This haptic device lets you feel the hair of virtual reality animals

When it comes to virtual reality, the challenge isn’t displaying convincing visuals — VR headset manufacturers have already figured that out. The real challenge is how to tickle our other senses, like smell, taste, and especially touch. To give people the ability to feel the fur of animals in VR, engineers have built this strange haptic device, called HairTouch, equipped with adjustable hair.

Read more…

David Huang’s Ultra-Low-Cost Wearable Tension Sensor Is Built From String and Pencil Graphite

Just rub some string against a pencil lead and you too can have your own low-cost, wearable tension sensor.

Maker David Huang has shared a trick for creating a surprisingly capable tension sensor at practically zero cost — by rubbing some string over a pencil.

“Our goal is use the cheapest and the easiest way to make your own sensor for your project,” Huang explains by way of introduction. “The sensor we are making today is a tension sensor. A tension sensor will react to a pulling motion. The most common material we use for the tension sensor is conductive rubber, or weaved conductive rubber wire – but the problem is the conductive rubbers are very expensive, and they are also hard to get.”

Read more…

Become the Next Jack Johnson with This Guitar AutoStrummer

Fortunately for aspiring folk rock stars that lack strumming skill, Jacob Stambaugh designed a DIY guitar AutoStrummer.

We all know that people who can play guitar are very cool, but it takes a lot of dedication to practice to actually get good at it. It’s easy enough to play power chords for some punk rock head banging, but learning all of the finger positions for the real chords requires perseverance. Strumming is usually considered the easy part of playing the guitar, because you just need to make sure you’re hitting the right strings. But even that can be tricky if the strumming pattern is complex. Fortunately for aspiring folk rock stars that lack strumming skill, Jacob Stambaugh designed a DIY guitar AutoStrummer.

Read more…

These DIY Smart Glasses Put an Arduboy in Front of Your Eyeballs

Kevin Bates has been on a two-year quest to build smart glasses that are hacker and wallet friendly, and the Arduglasses are the result.

Google Glass will go down in history as the first pair of smart glasses to hit the consumer market and also one of the most infamous tech flops. They had some really impressive technology, but they were probably a bit ahead of their time when they first released in 2013. Privacy concerns combined with a high price tag ensured that they never really caught, but they did prove that the technology was feasible. Technically, you can still purchase an enterprise version of the Google Glass smart glasses, but nobody does. Kevin Bates has been on a quest to build smart glasses that were more hacker and wallet friendly, and the Arduglasses are the result.

The Arduino Nano RP2040 Connect is here

It was back in January that we first introduced you to the Arduino Nano RP2040 Connect. The first Arduino board to include Raspberry Pi silicon. It’s been a roller coaster ride getting it to you, and enthusiasm during the wait has been incredibly encouraging. The wait, you’ll be glad to hear, is over.

The RP2040 Processor

Working with the Raspberry Pi Foundation is nothing short of a pleasure. The teams there make some incredible devices, and their first in-house silicon is no exception. These guys get it.

This system-on-a-chip is a 32-bit dual-core Arm Cortex-M0+ microcontroller, clocked at 133MHz and is powerful enough to run TensorFlow Lite. It’s young, but proving to be incredibly popular with makers, as well as electronics manufacturers. It’s going to be incredibly exciting to see how the Arduino community reacts to it. We can only imagine what you guys can achieve with the extra features of the Nano RP2040 Connect board.

Read more…

Mr Innovative’s resistor cutting machine is ‘reely’ awesome

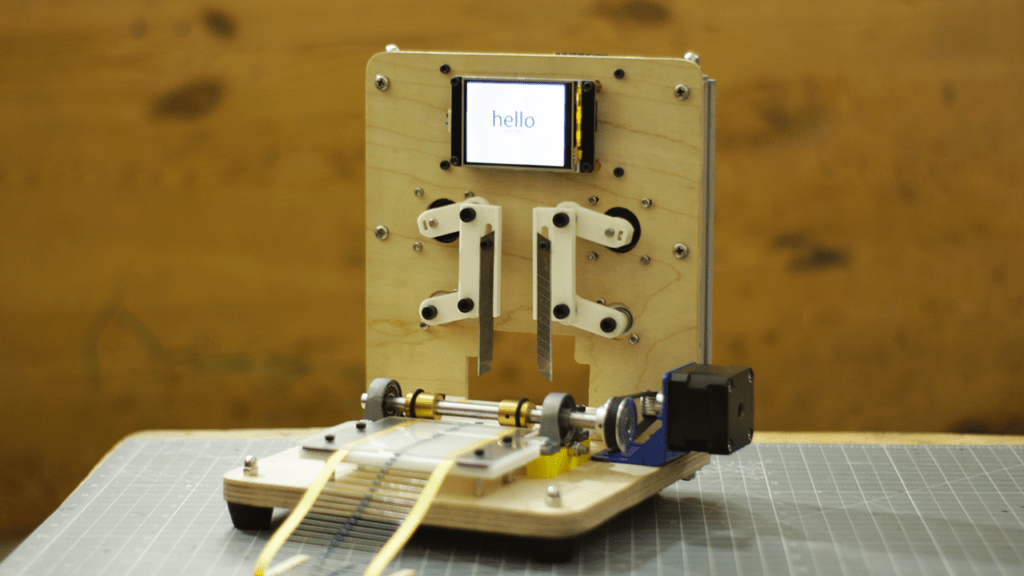
If you need some help separating out lots of resistors, then Mr Innovative’s latest automated rig is the perfect solution for you. At the heart of his homemade device is an Arduino Nano, along with a multipurpose PCB for electrical connections and a touchscreen user interface.

The machine advances the reel of resistors through a slot via a stepper-driven rod and o-ring friction wheel assembly. When properly positioned, it cuts off the correct number of resistors using a pair of razors, set in motion by two stepper motors and corresponding linkage systems.

Read more…

Arduino-controlled Rubik’s cube chandelier solves itself

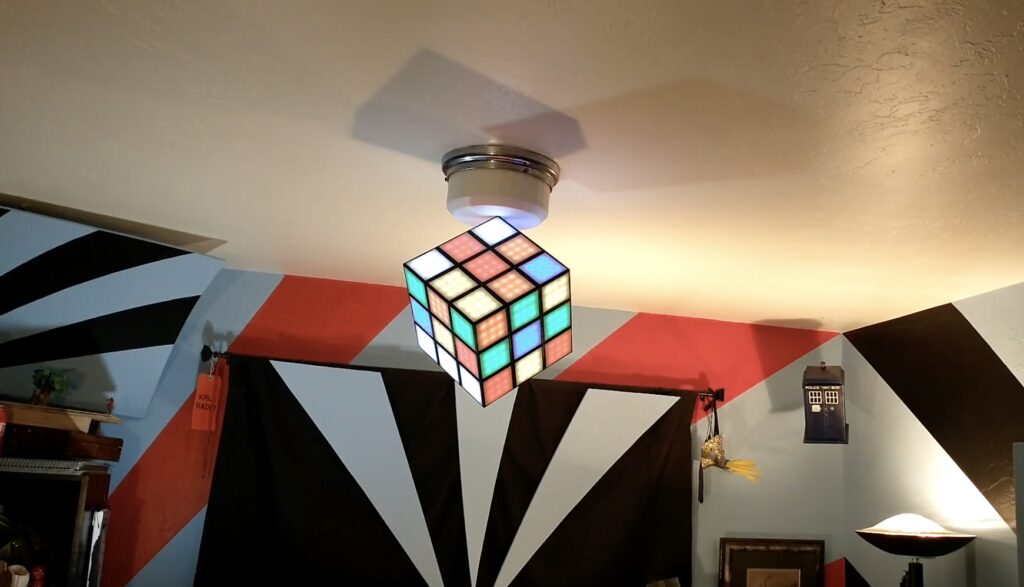
Rubik’s cubes have been mystifying and frustrating people for more than 40 years now. According to Forbes, 450 million Rubik’s cubes had been sold by 2020. But based on our very scientific estimates, only a small fraction of those have been solved. To avoid that difficulty, Stuart Gorman gave his Rubik’s cube chandelier the ability to unscramble itself.

This large 3D-printed chandelier looks exactly like the iconic cube, except that each section is lit by LEDs instead of covered with a sticker. Those are WS2812B individually-addressable RGB LEDs controlled by an Arduino Mega board. People usually choose the Mega when they need a lot of I/O pins, but in this case Gorman picked the Mega because it has lots of RAM to work with. That RAM is necessary for handling the complexity of the Arduino code that the lamp is running.

Read more…