Is the Gameboy too big for you? Do you strain to get your hands around the Bittboy?
Is the Arduboy just too much heft for ya?
Well today you are in luck as I take a look at the #Pocketstar: The smallest handheld game system in history!
Month: September 2019
Achieve true 3D printing with non planar slicing
This is the most interesting thing I’ve done with my 3D printer in some time. Instead of printing in a series of 2D planes stacked up to form a 3D shape (2.5D), this non planar technique creates geometry with true 3D tool paths that can eliminate the steps often seen on shallow surfaces. Based on the amazing Masters Thesis of Daniel Ahlers and the University of Hamburg, this development can be tried yourself if you are willing to put in some time to setting it up.
In this video I’ll lead you through step by step on how to setup a virtual Linux machine on your PC, compile the custom version of Slic3r and then share with you my results. The future is bright and I thank people like Daniel Ahlers and Moritz Walter for leading the way.
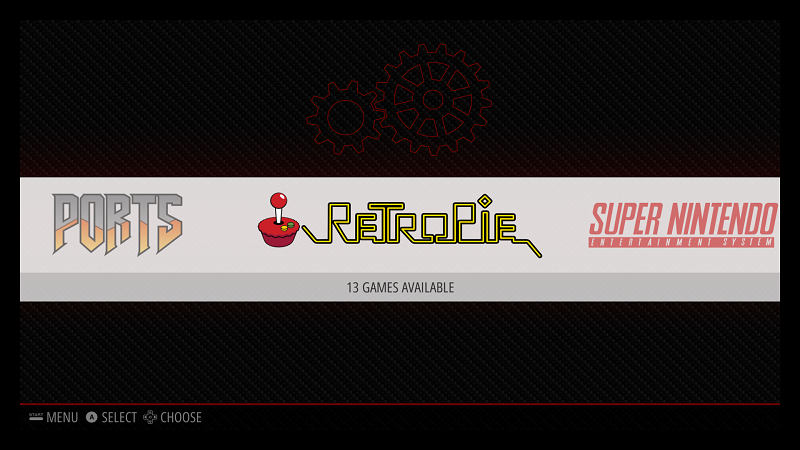
RetroPie – Expanding storage on your SD card.
Most RetroPie images you download wont take advantage of all the free space on your SD card, so how do you expand the partition to utilize the remaining space?
raspi-config is the option we are looking for!
This menu can either be accessed from the main menu once everything is booted.
First Navigate to the RetroPie Settings menu
From here you can access raspi-config
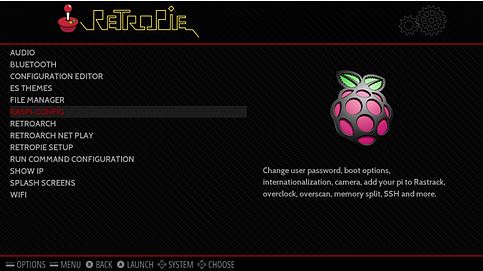
It is also possible to access this menu from command line and an SSH session.
For instructions on getting your RaspberryPi connected to WiFi and setting up SSH, take a look at our other Tutorials;
Configuring RetroPie to connect to WiFi with no keyboard or display.
Configuring RetroPie for SSH with no keyboard or display.
Once you are at the command prompt running the following command will load up the raspi-config menu.
sudo raspi-config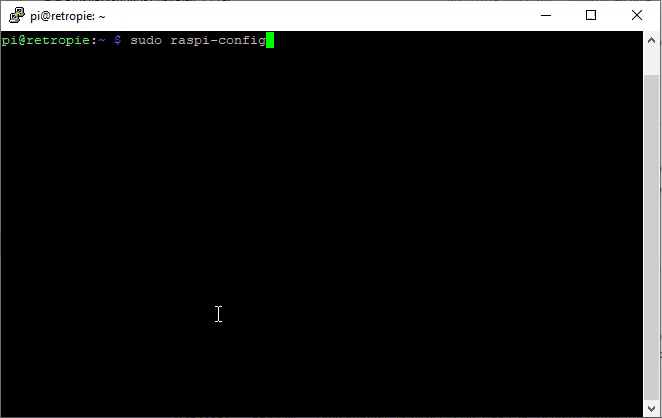
Once in the raspi-config menu, you will want to navigate to
(7) Advanced options
(A1) Expand Filesystem
This will all be pretty automatic, it will grow the file system to take up the remaining space on your SD card.
Once complete, choose OK at the reboot warning, Finish and then allow the device to reboot.
Once rebooted your Retropie setup will utilize all available space on your SD card for ROMs and other data!
Deep Ink Diver Is a Scalable Pen Plotter
If you’ve ever wanted to do a “deep dive” into how plotters work, then the d.i.d., or Deep Ink Diver, from studioprogettiperduti looks like a great option. The device boasts a structure made out of aluminum extrusion, plus some 3D-printed parts, enabling it to be scaled up for different sized paper as needed.

The Story of Virtuality | Nostalgia Nerd
Ever since I laid eyes on these wondrous cyberpunk like machines in the 90s, I was captivated. Huge pod like booths, connected to massive, bright headsets seemed like the future; Virtual Reality seemed like the future. In a way it was, because W Industries and Virtuality created something pretty staggering for the 90s. Here was VR which worked, it was immersive and even better, it was affordable, meaning arcades, leisure centres and theme parks were quick to get their own pods installed. So join me on a personal quest of enthralment, as I look at the company and machines behind the original Virtual Reality boom of the 1990s.
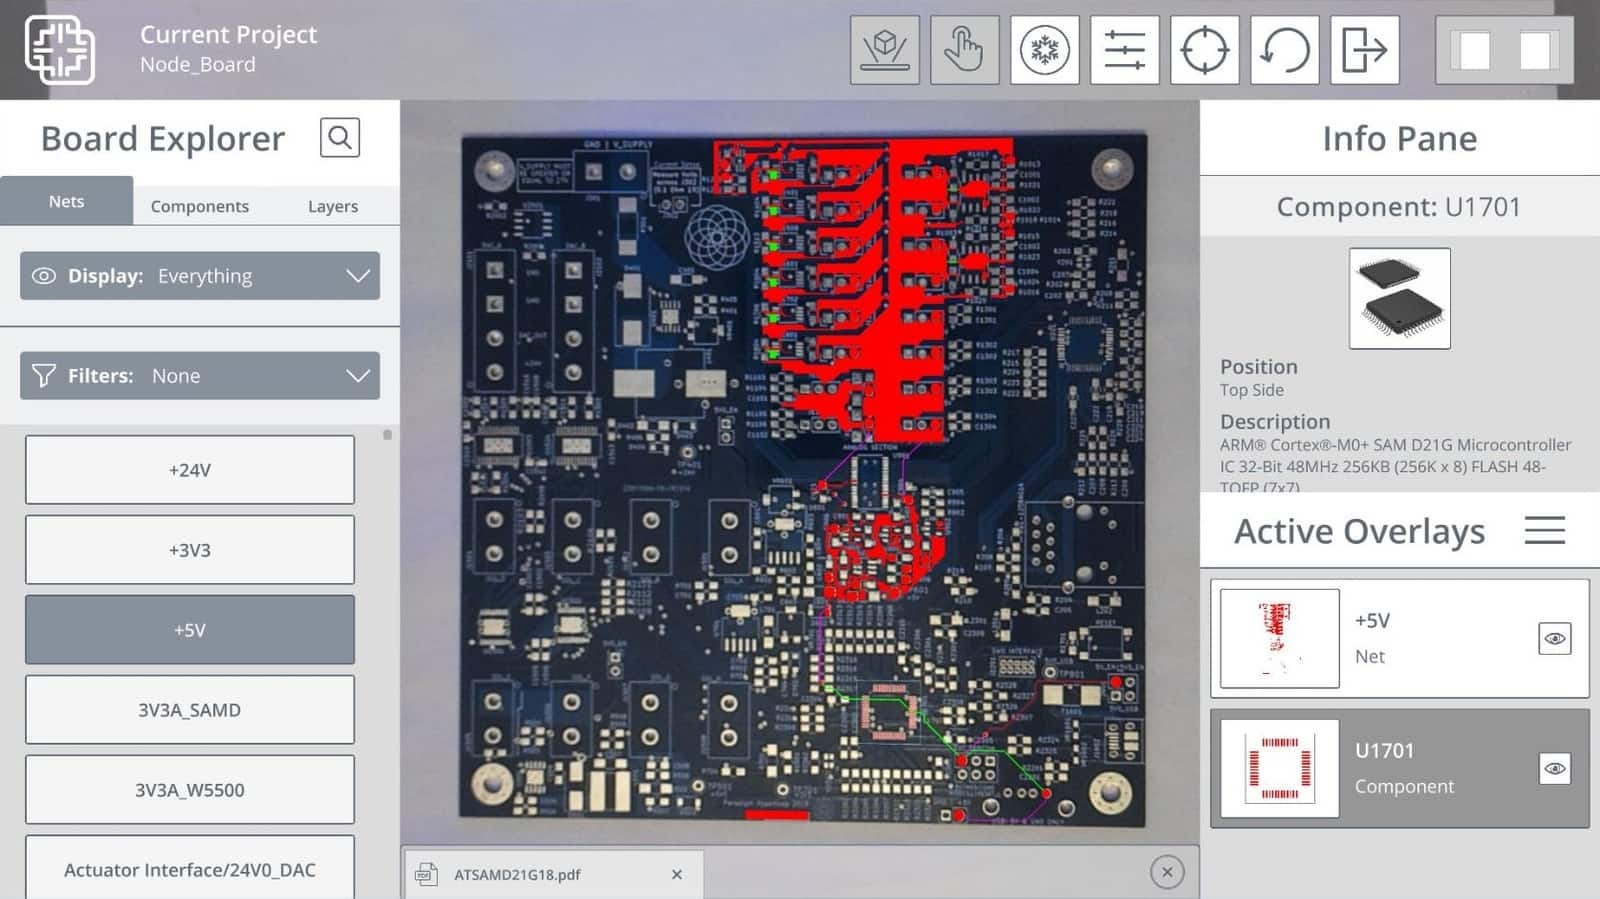
Inspector Uses Augmented Reality to Help You Inspect Your PCBs
It is now very affordable to have your own PCBs fabricated and delivered to your door, and free open source software like KiCAD makes it easier than ever to design them. But you’re still going to have to validate and test your PCBs once they arrive. That can be a surprisingly laborious task if your PCB is complex. Fortunately, new software called Inspectar promises to make your board inspections quick and easy with the help of augmented reality.
Block EVERY Online Ad with THIS
We check out Pi-Hole, a software designed to block ads on your entire network, that can run on a $5 computer!