If you’ve ever tried to document a project on your workbench with photos or videos, you know the challenge of constantly moving tripods to get the right shot. [Mechanistic] is familiar with this frustration, so he built a small desktop camera crane.
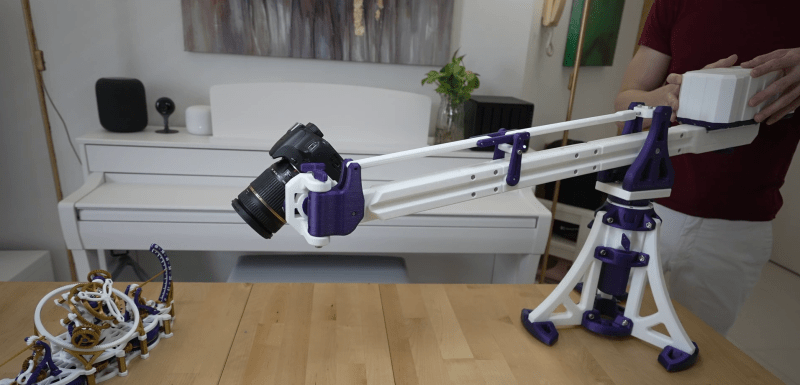
If you’ve ever tried to document a project on your workbench with photos or videos, you know the challenge of constantly moving tripods to get the right shot. [Mechanistic] is familiar with this frustration, so he built a small desktop camera crane.
This time I will show you how to make a simple Arduino oscilloscope. The maximum signal frequency that the oscilloscope can display is 20 kHz, and the maximum input voltage is 5 V without a voltage divider.
A simple VU meter realized with only mechanical typical items, as screws or nuts, but powered by Arduino!
I have always been attracted by VU Meters, in fact at home I had designed a system to listen to music using my father’s old A/V mixer equipped with 2 VU meters, the first one for the left audio channel and the second one for the right audio channel. One day, suddenly, the mixer stopped working, so I decided to make a VU meter myself using Arduino…
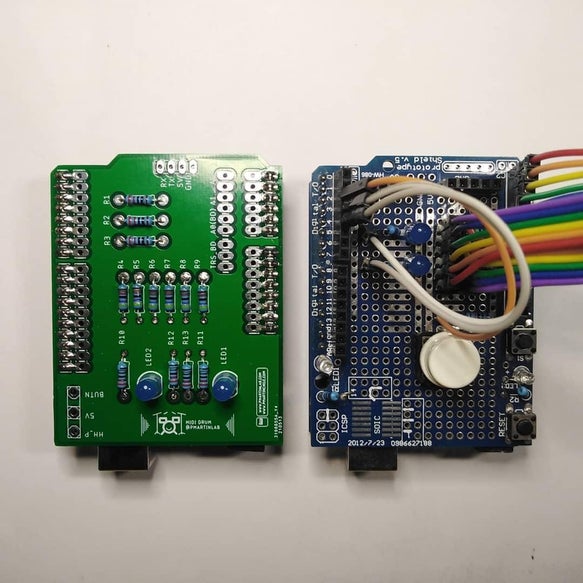
Hi! This is ATOMIC, a 6-pad MIDI drum controller made with Arduino made for music production and fun!
The button allows you to change the notes of the pads which is defined in the codes as modes A (Pattern) and B (Fill mode). The idea behind this is that you first record the basic pattern in you DAW and then you add extra sounds like toms or plates. Two LEDs indicates which mode are you using, and there´s a connection for a hi-hat pedal.
A signal generator usually has various signals that is can generate, such as Sine, Square and triangle. Others have a sweep function and an arbitrary waveform. These are useful tools in the workshop. They can be used to test out audio circuits, op amp circuits and testing circuit response. Most modern function generators can easily put out frequencies up to 1 Mhz.
So, while I did not expect an Arduino based sine wave generator to replace my desktop function generator, I thought it would be interesting to see how to go about designing one and how it would perform.
How to make a sensitive homemade lightning detector based on cheap AM receiver IC TA7642 and Arduino Nano.
A lightning detector is a device that detects lightning produced by thunderstorms.
In one of my previous videos, I showed you how to make such a detector with the help of the AS3935 sensor board which is specially designed for this purpose. This time I will show you how to make same such device, but now with a homemade detector circuit based on cheap AM Receiver IC TA7642.
In this episode I will ditch the idea of an ultrasonic mist maker and instead focus on more common fog/smoke machines. I will show you how they use “fog juice” in order to create smoke and at the end I will come up with my own crude mini fog/smoke machine design that did actually work. Let’s get started!
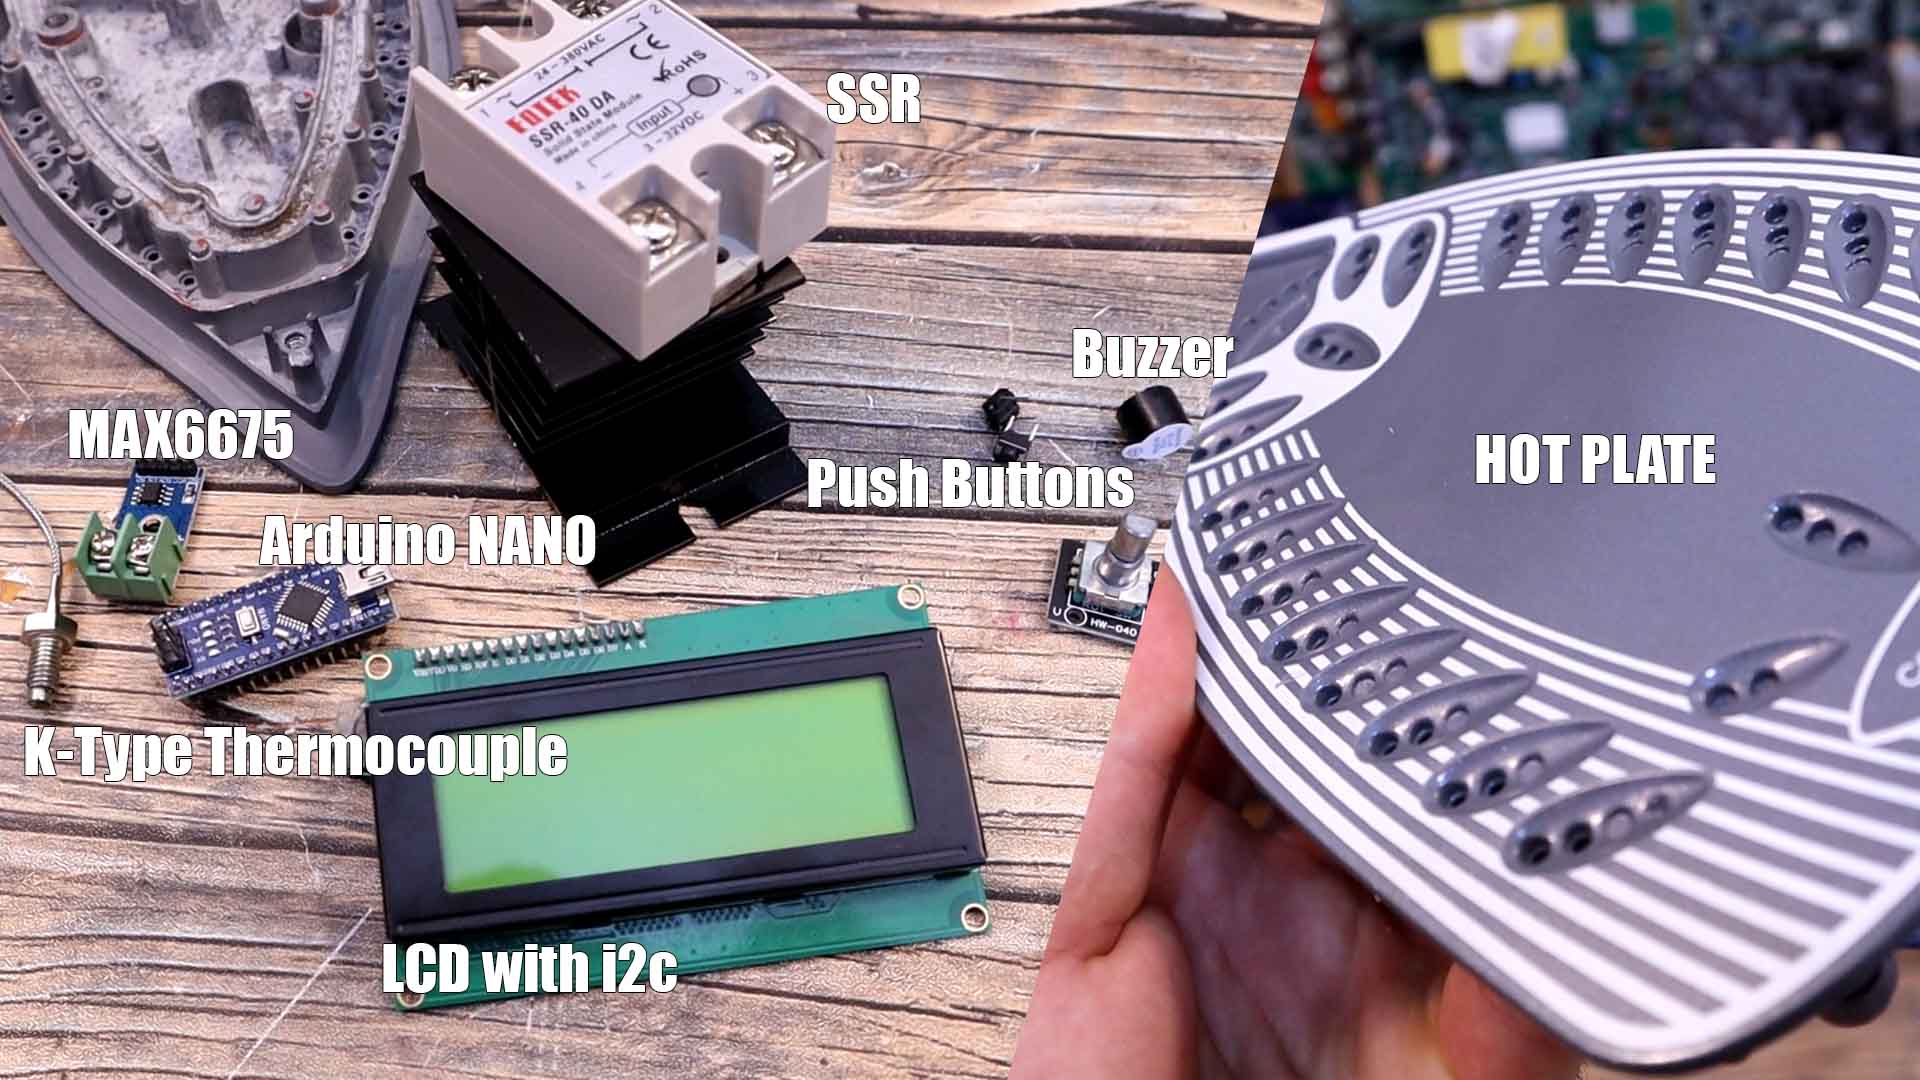
I’m preparing a video where I show you how to make the PCB design and order the panel version for your board and then solder all components at once. In that way you can save time and finish your product faster so they will be ready for sale. To do that I need a reflow hot plate and that’s what we will build today using a second-hand clothes iron. We need to measure the temperature, show the power and that temperature on a screen so the user could see the values, we need to control power and in this case a lot of power because my iron is of 3000W, and then we need to have some sort of menu or control in order to select the settings. Let me show you what parts we need, the connections I will do, how to measure and control the temperature at high power and also show you the code. Finally, let’s see if this homemade reflow hot plate will work and if I can reach the desired temperature curve, so what do you think, will it work? So, guys, let’s get started.
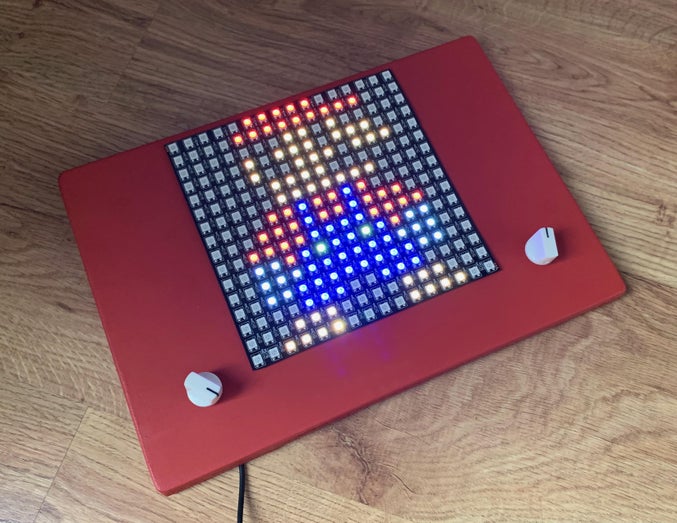
A modern take on an old classic — create colour pixel art by turning two rotary encoders to control the horizontal and vertical position of the cursor, click to change colour. All controlled by an Arduino Nano.
How it works
10 more 3D printed tools, which could be useful to you. You can buy this kind of tools from store, but why not to 3d print them.