Hacking Your Room’s Lighting to Match the Flickering Lights in Quake Makes the Game Feel Even Moodier

As much fun as Doom was, it felt more like a gory cartoon with most of the scares coming from enemies hidden behind doors and blind corners. Quake, on the other hand, felt endlessly creepy and scary thanks in part to its real-time lighting that helped set the mood. To make any room feel as spooky, Rodrigo Feliciano went back to the game’s original source code to make a flickering Quake lamp.

What exactly is going on with the power grid where Quake takes place is anybody’s guess—there’s zero chance those buildings are up to code—but as someone discovered back in June, the moody lighting in Half-Life: Alyx used the same flickering code as the original Half-Life, and that code can actually be traced all the way back to Quake, which was created by id Software’s John Carmack over 25 years ago.

Read more…

An Arduino-powered underwater ROV made out of PVC pipe

Exploring the vast underwater world is exciting, and personal breathing devices such as SCUBA allow for people to descend far further than usual. However, robots can be even better since they can operate much longer and more efficiently than a person. And because these underwater remotely operated vehicles (ROVs) can be so expensive, Ranuga Amargasinghe wanted to construct his own DIY version that costs less. 

Read more…

“Mechanical” VU Meter

A simple VU meter realized with only mechanical typical items, as screws or nuts, but powered by Arduino!

I have always been attracted by VU Meters, in fact at home I had designed a system to listen to music using my father’s old A/V mixer equipped with 2 VU meters, the first one for the left audio channel and the second one for the right audio channel. One day, suddenly, the mixer stopped working, so I decided to make a VU meter myself using Arduino

Read more…

MIDI Drum Controller “Atomic”

Hi! This is ATOMIC, a 6-pad MIDI drum controller made with Arduino made for music production and fun!

The button allows you to change the notes of the pads which is defined in the codes as modes A (Pattern) and B (Fill mode). The idea behind this is that you first record the basic pattern in you DAW and then you add extra sounds like toms or plates. Two LEDs indicates which mode are you using, and there´s a connection for a hi-hat pedal.

Read more…

Speak4Me is an eye-to-speech module designed to assist those unable to communicate verbally

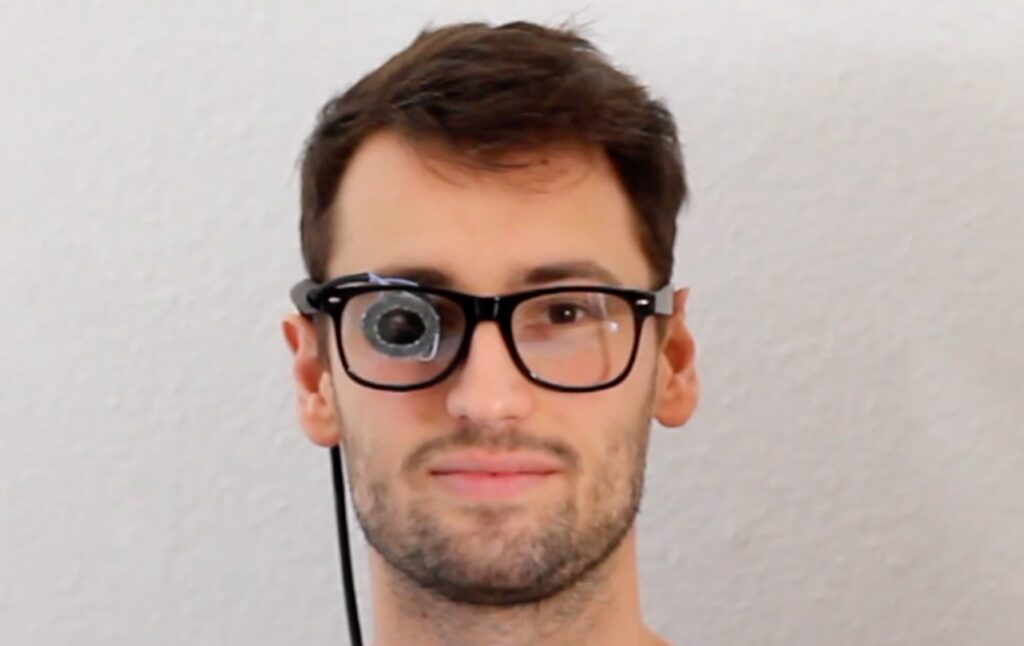
People who suffer from physical disabilities that leave them unable to speak or communicate effectively can end up frustrated or largely ignored. In response to this issue, Hackaday users MalteMarco, and Tim R wanted to create a small device that can turn small eye movements into simple commands and phrases for easier communication, which they call the “Speak4Me.”

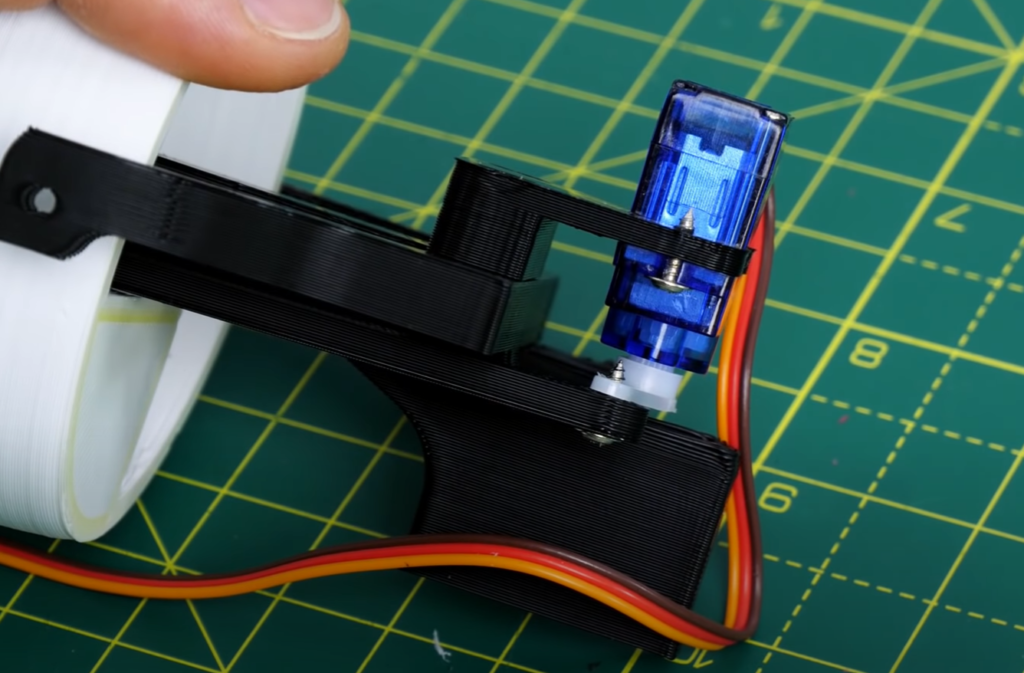
At the most basic level, the Speak4Me consists of an Arduino Nano board that controls a set of four infrared sensors which are pointed at the user’s eye within a single glass lens. Then once every 100 milliseconds, a measurement is taken to determine the location of the pupil and thus the direction being focused on. The word or phrase is chosen by first selecting a profile containing four groups of four elements each, for a total of sixteen possible combinations per profile. As an example, the caretaker profile has elements such as “yes,” “I want to sit,” and even “I need medical treatment.”

Read more…

Arduino Sinewave Generator

A signal generator usually has various signals that is can generate, such as Sine, Square and triangle. Others have a sweep function and an arbitrary waveform. These are useful tools in the workshop. They can be used to test out audio circuits, op amp circuits and testing circuit response. Most modern function generators can easily put out frequencies up to 1 Mhz.

So, while I did not expect an Arduino based sine wave generator to replace my desktop function generator, I thought it would be interesting to see how to go about designing one and how it would perform.

Read more…

How To Make Robots Move Smoothly | Arduino Tutorial

There are lots of great animatronic and robotics props and projects out there, and it’s easy to make r/c servos and other actuators move using the Arduino servo library. This means that the servos stops and start very suddenly, moving as fast as they can between positions. In this video I’m going to show you two lines of very simple code to make things smoother.