Ping Pong Scoreboard with animation and sound

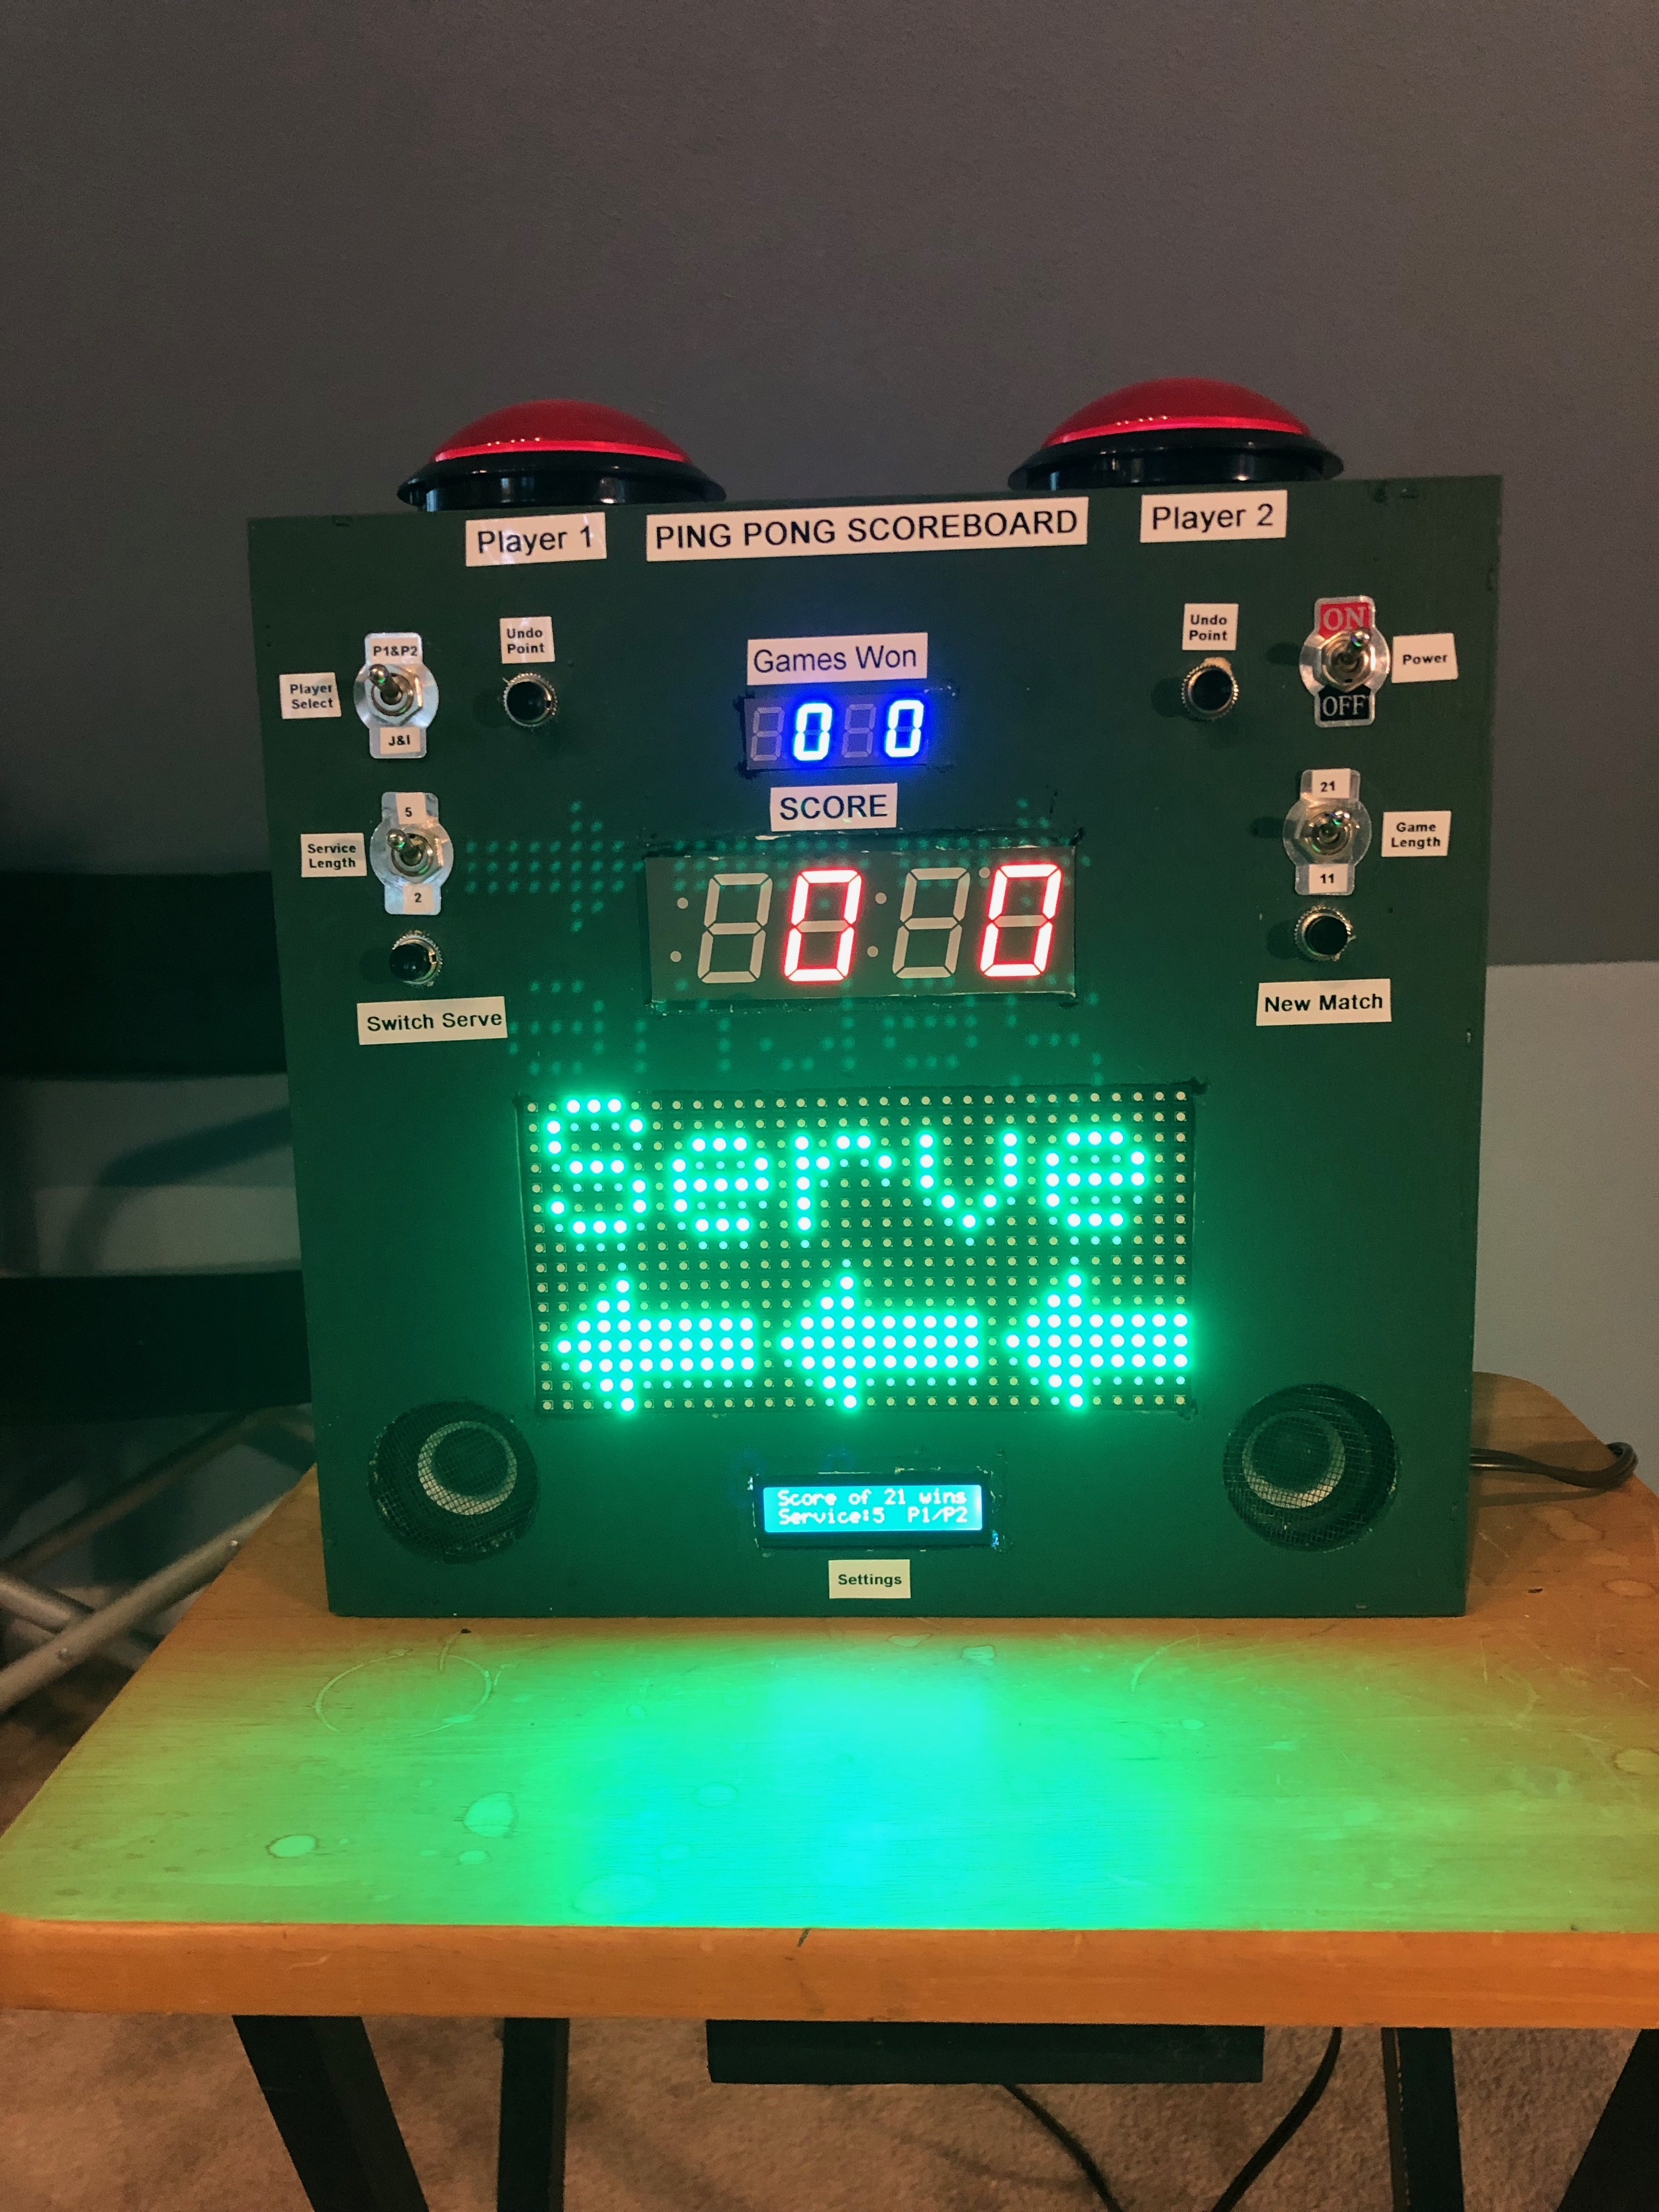
We play a lot of ping pong, but lose track of the score and who is supposed to serve. This scoreboard introduces the game, keeps track of whose serve it is, keeps score and congratulates the winner at the end. Uses an rgb matrix and a soundboard.

The scoreboard uses an Arduino Mega (for the RGB matrix and soundboard pins, mostly) and several LED and LCD panels.   The games are configurable to be either 11 points or 21 and the service can be switched at either 2 points or 5 points.  The warmup begins with a virtual ping pong match on the matrix and then several vocal announcements including “Lets Play Ping Pong” and “Shall We Play a Game”.  Each point is entered using a big lighted button on the top (one for each player).   Service is announced with “Switch Serve” and the arrows pointing towards player 1 or  2.   The announcement of player can be switched from two specific people by name or generic “Player 1” and “Player 2”.   At the end of a game, the winner is announced and there’s applause, etc.  The soundboard is loaded with all these sounds, etc.

Read more…

How to Make a Tic Tac Toe Using a TFT Touchscreen

In this project, I will show you how to make a Tic Tac Toe with a TFT Touchscreen.

This code displays a Tic Tac Toe on your TFT screen. This game can be played using the tactility of your screen.

The first screen displays the title and some explanations about the game. The second screen is the “playing board” : it’s here that you can place your pads.

There are two type of pads : red and blue pads (because this game can be played only with two people). If someone win, a message will be display (“Victory, Player 1/2 win !”) and the game starts again. If nobody win, another message will be displayed, saying : “No winner.”.

Read more…

A pushbutton control panel for your Zoom calls

Today with most people working from home using teleconferencing applications, a custom control panel for such interactions could come in handy. This inspired professor Elena Long to design her own Zoom interface around an Arduino, a 3D-printed enclosure, and a series of pushbuttons that allow for custom printed icons.

Long’s device features 12 main buttons — five momentary, seven latching. These are wired to light up via LEDs. There’s also a large red mushroom button on the end provides a final latching input, which is perfect for aborting calls with a flourish.

Read more…

DIY Mini CNC Laser Engraver.

This is an Instructables on how I Remixed my old CNC Laser engraver and made a Stable version of an Arduino based Laser CNC engraver and thin paper cutter using old DVD drives and using 250mW laser.

Old Version of My CNC :https://www.instructables.com/id/Mini-CNC-Laser-Wood-Engraver-and-Paper-Cutter/

Old version was not much stable and had some wobble due to uneven parts, so I decided to make a stable version of it using 3D printed parts. Which gave me excellent results in laser engraving even in very tiny details, this machine is cable of doing the work well. You can see the details in the eye of the engraved picture.

Playing area is 40mm x 40mm max.

Read more…

This Acoustic Levitation Wand Will Make You Feel Like a Wizard

Nothing is cooler than Redditor We-Make-Projects’ Arduino-powered sonic tractor beam!

Levitation has long been the domain of stage magicians, charlatans, and fiction, but there are technological means of achieving the same result. Aside from aircraft that could be considered to be levitating on air and boats that do the same on water, the most common examples of levitation in real world are maglev (magnetic levitation) trains. But you’ll probably never be able to build your own maglev train in your backyard. You can, however, experiment with acoustic levitation. We’ve seen a handful of notable acoustic levitators here on Hackster, but nothing is cooler than Redditor We-Make-Projects’ acoustic levitation wand that makes them a modern wizard.

Read more…

Homemade machine puts a new spin on winding yarn

If you’ve ever wanted to wind balls of yarn, then look no further than this automated machine from Mr Innovative. The YouTuber’s DIY device is powered by an Arduino Nano and an A4988 stepper driver, spinning up a round conglomeration of yarn via a NEMA17 motor and a timing belt.

The ball is wound on an offset spindle, which is mechanically controlled to pitch back and forth and spin itself as the overall assembly rotates, producing an interesting geometric pattern.

Read more…

Design and Development of a Robotic Hand

Over the few years, there have been great steps in the development of functional prosthetic hands. However, even the most advanced hands lack a combination of high functionality and affordability. A new prosthetic hand has been designed and developed combining high functionality and affordability thanks to rapid prototyping techniques. This video presents the design of a five-fingered prosthetic hand that can be programmed to have multiple grip patterns using force myography (FMG) as a control signal instead of electromyography (EMG) signal. A novel FMG sensor was developed using strain gages and a high resolution ADC to detect mechanical muscle contractions from the residual forearm of amputees.