NerdForge builds a Nanoleaf Aurora, and shows how it was done.
 CrackedConsole
Raspberry Pi Sees More Competition With Odroid-N2 Release
Raspberry Pi’s continued success has proven that itty-bitty computers aren’t just a fad. That success has attracted a long list of competitors too, and that list grew this week with the official release of Hardkernel’s new Odroid-N2 single board computer.
Hardkernel announced the Odroid-N2 in February. The device comes in two variants: one with 2GB of RAM that costs $63 and one with 4GB that costs $79. Those versions are otherwise identical, so unless someone’s looking to minimize costs as much as possible, we suspect most people will spend the extra $16 to double the memory.

These tiny SanDisk 1TB microSD cards are breaking speed records
An entire terabyte of data can now fit on a microSD card — and now data can be recorded as fast as 160MB per second. On Monday, February 25, Western Digital announced the 1TB SanDisk Extreme UHS-I microSDXC card during Mobile World Congress. While the new microSD is not the first to reach that 1TB capacity, the company says the new card is the fastest 1 TB UHS-1 microSD card yet. Micron also launched a 1TB card, joining Lexar’s 1 TB announced earlier this year.
Threaded Inserts in 3D Prints – How strong are they?
CNC Kitchen tested the strength of brass threaded inserts and will compare it to cut threads and 3D printed threads. Let’s find out if it’s worth adding these metal parts to your designs!
$75 Plug and Play Nintendo GameCube HDMI Adapter – The Carby Version 2 | MVG
On the market for an HDMI Adapter for your GameCube but dont want to break the bank? The Carby V2 by Insurrection Industries might be just the thing for you.
Crackedconsole Store coming online next week!
Crackedconsole web store will be going officially online coming this next week. April 2019!
Our first products will be the following;
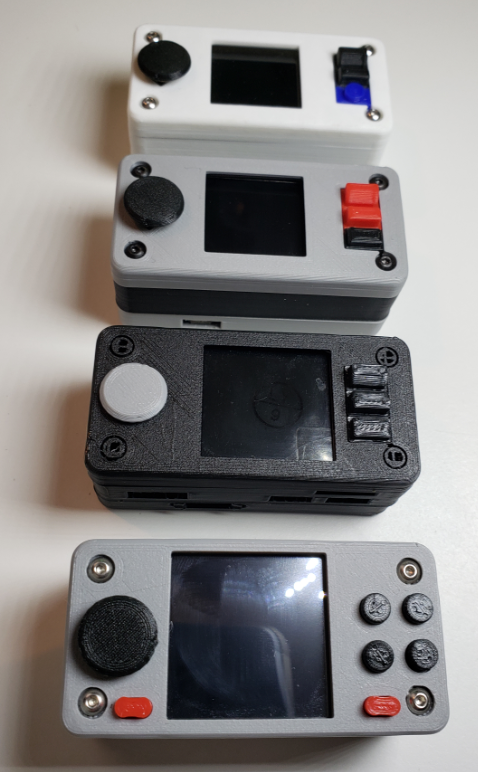
PinkyPi Standard – 3D Printed Case
You can choose between the 1.3inch LCD or the 1.4inch LCD version
Color options currently include – Black,Grey,White,Blue,Red,Purple
PinkyPi Standard Slim – 3D Printed Case
You can choose between the 1.3inch LCD or the 1.4inch LCD version
Color options currently include – Black,Grey,White,Blue,Red,Purple
PinkyPi Standard Button Pack
You can choose between the 1.3inch LCD or the 1.4inch LCD version (match to the case purchased as buttons differ)
Color options currently include – Black,Grey,White,Blue,Red,Purple
PinkyPi Standard Electronics Kit
Battery,Charger,Amp,Speaker,Power Switch, Resistor and Capacitor for audio filter
Screws, standoffs
PinkyPi Standard – Limited Edition 3D Printed NES Themed Case (Case and Buttons)
A Black and Grey case combo
Red and Black button kit
Coming Soon!
PinkyPi Pro Cases and Kits!
Rock Pi 4B : M.2 & USB 3.0 SBC
Rock Pi 4B single board computer review and demo, including testing a WD Black M.2 NVMe SSD in Debian, and media playback in Android. The video also shows the acrylic case, eMMC module, and large heat sink.
Galaxy S10 Teardown – Does Ultrasonic Measure Up?
Taking apart the Galaxy s10 is pretty similar to years past… EXCEPT that this time around not everything is repairable. Samsung has made the charging port permanent on the S10. So if you ever need to replace that port (to charge your phone, or access your data) it wont be possible without advanced soldering techniques.
Configuring RetroPie for SSH with no keyboard or display.
Accessing your RetroPie project over SSH allows you to configure drivers, software and settings with out having a keyboard or even a screen connected to your Raspberry Pi.
You can enable SSH from the Boot folder of the SD card, first we must put the SD card in our computer and open the Boot folder.

Create a file in this folder called ssh with NO extension (no .txt, no .conf, no extension)
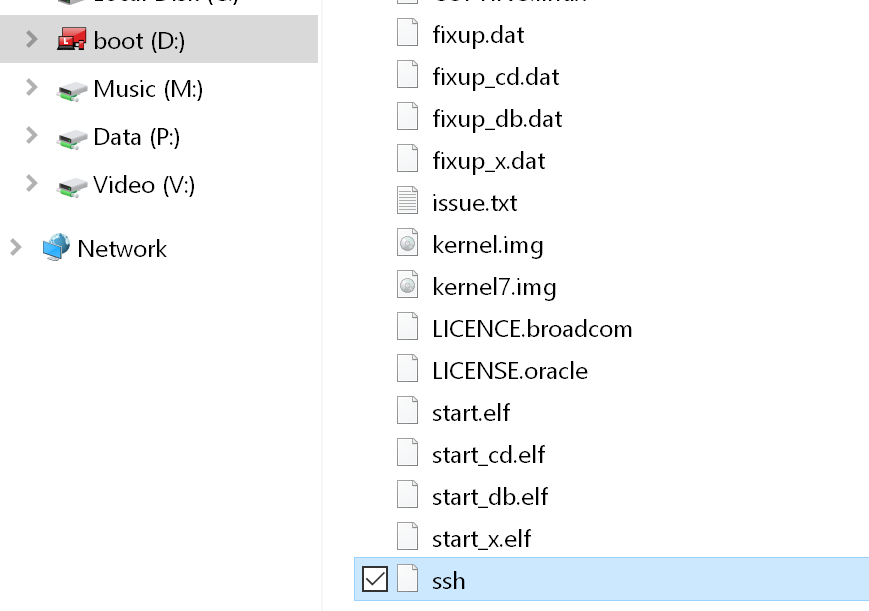
Once this file is created, you can boot your RetroPie Raspberry Pi build and access the device over SSH to do the work and configuration you need to.
If you are a Windows user, be sure to check out PuTTy to access the device over SSH.
The default hostname for Retropie is, retropie
And the default username and password are pi / raspberry
If you would like to setup your WiFi in the same way, check out our WiFi guide.
Configuring RetroPie to connect to WiFi with no keyboard or display.
Looking to connect your RetroPie project to your WiFi, but have no display or keyboard connected? RetroPie allows us to place a file called wpa_supplicant.conf in the boot folder of the SD card.
Connect your SD card to your computer and open the Boot folder.
Create a file called wpa_supplicant.conf in this folder, I use notepad++ to assure compatibility with the RetroPie OS.
For best results, set the End Of Line conversion to Unix (LF)
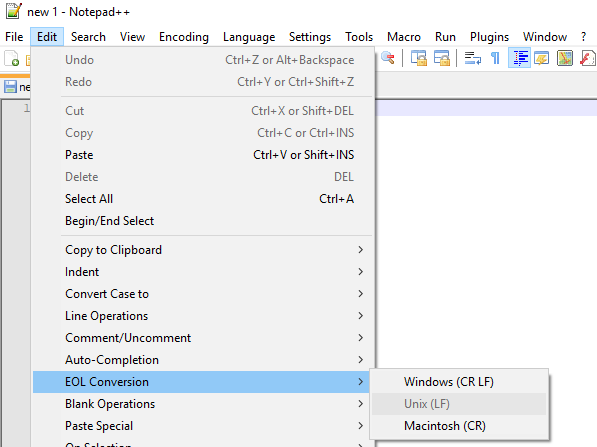
And add the following text, be sure to modify the settings to match your network and location.
country=US
ctrl_interface=DIR=/var/run/wpa_supplicant GROUP=netdev
update_config=1

# RETROPIE CONFIG START
network={
    ssid="Your-network-name"
    psk="Your-network-password"
}
# RETROPIE CONFIG END
Save this file and your ReptroPie device should now boot and connect to your network.
By default the device name is retropie , and you should be able to locate this on your network.
This is assuming you are using WPA and RetroPie 4.1 or higher for your build.
For more RetroPie network options, check out the Official RetroPie WiFi Setup Guide
If you wish to configure SSH on your device as well, Check out this guide.