I recently started using Unified Remote fro several of my Media Center devices and other computers through out my home, this includes my security console as well as all TVs and some various other devices.
I have a Raspberry Pi Zero W that I’ve configured for use as a portable desktop PC, and is perfect for traveling and hotel stays, yet I didn’t want to lug around a keyboard and mouse or additional hardware.
Enter Unified Remote!
It turns your cell phone into a keyboard, mouse, game controller or other remote control functionality! It does require a server component to install on each device you wish to control, but lucky for us there is a Raspberry Pi version.
To install, you can follow these simple command lines to get everything up and running.
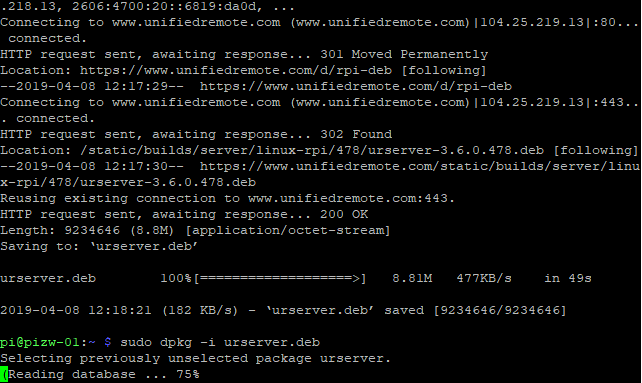
wget -O urserver.deb http://www.unifiedremote.com/d/rpi-deb
sudo dpkg -i urserver.deb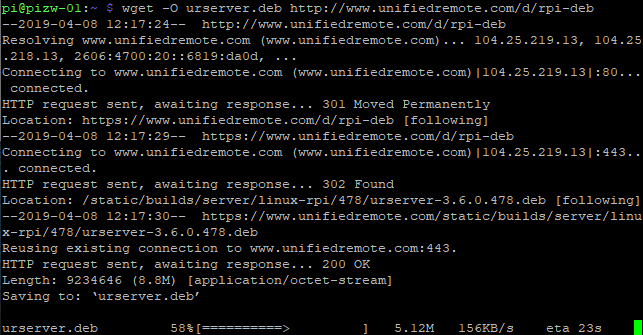
Once installed, you may need to start the service for the first time.
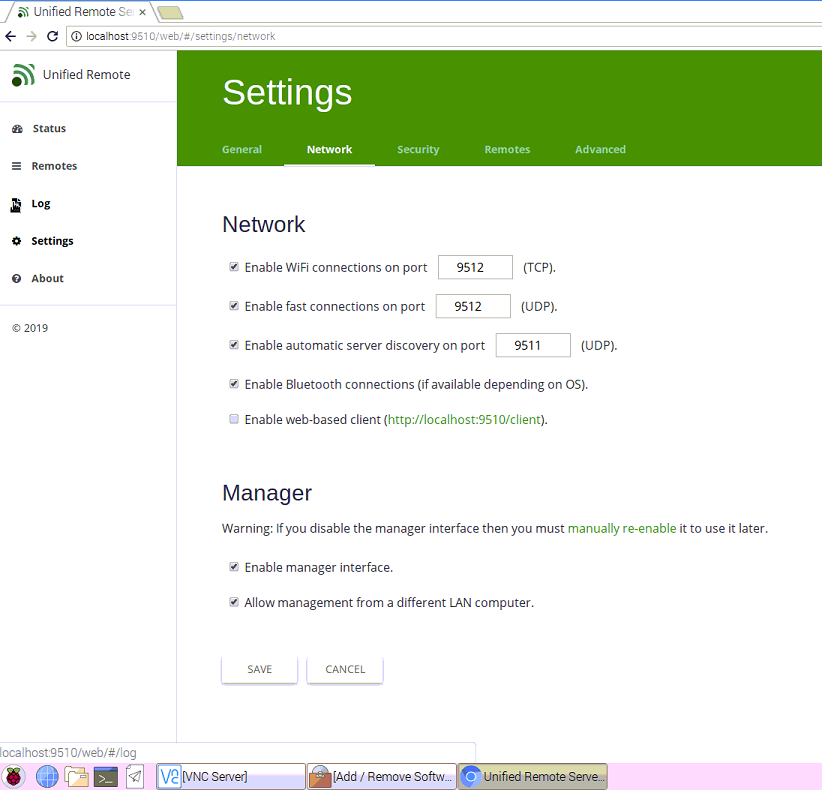
sudo /opt/urserver/urserver-startAfter the service has been started, you can either navigate to the management console on the Pi itself via http://localhost:9510/web or with the IP address of your Raspberry Pi device http://<IPAddress>:9510/web
This console will allow you to configure WiFi, Bluetooth and WebUI connectivity, set passwords and other functionality.
If you aren’t booting to a desktop environment, and instead booting to something like RetroPie, you may need to set the service to start with rc.local.
To do so, you can do the following.
sudo nano /etc/rc.localAnd add the following line, being sure to include the & at the end.
sudo /opt/urserver/urserver-start &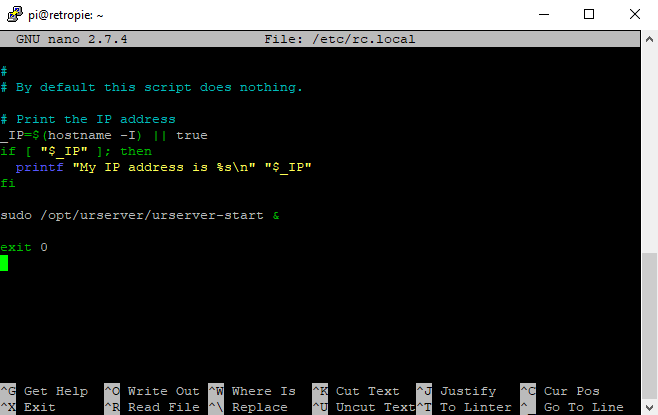
Sources:
Installing Unified Remote on Debian via CLI
Unified Remote home page
Thank you for this guide; I followed these steps on osmc and it works perfectly to get UR installed and running on startup
That said, I can move the mouse cursor using basic input remote but I can’t make any left or right clicks register on the pi. Any workaround?
I have yet to encounter this issue, but I can do some testing and see what I come up with.