Are you looking to make a backup of your Raspberry Pi, have you spent weeks setting everything up and want to save an emergency copy? Or are you looking to clone your RetroPie build efforts to multiple SD cards?
Check out Win32DiskImager a free Open Source disk image tool for SD cards on Windows.
Once you have Win32DiskImager installed, connect your SD card you wish to save to an img file and launch Win32DiskImager.
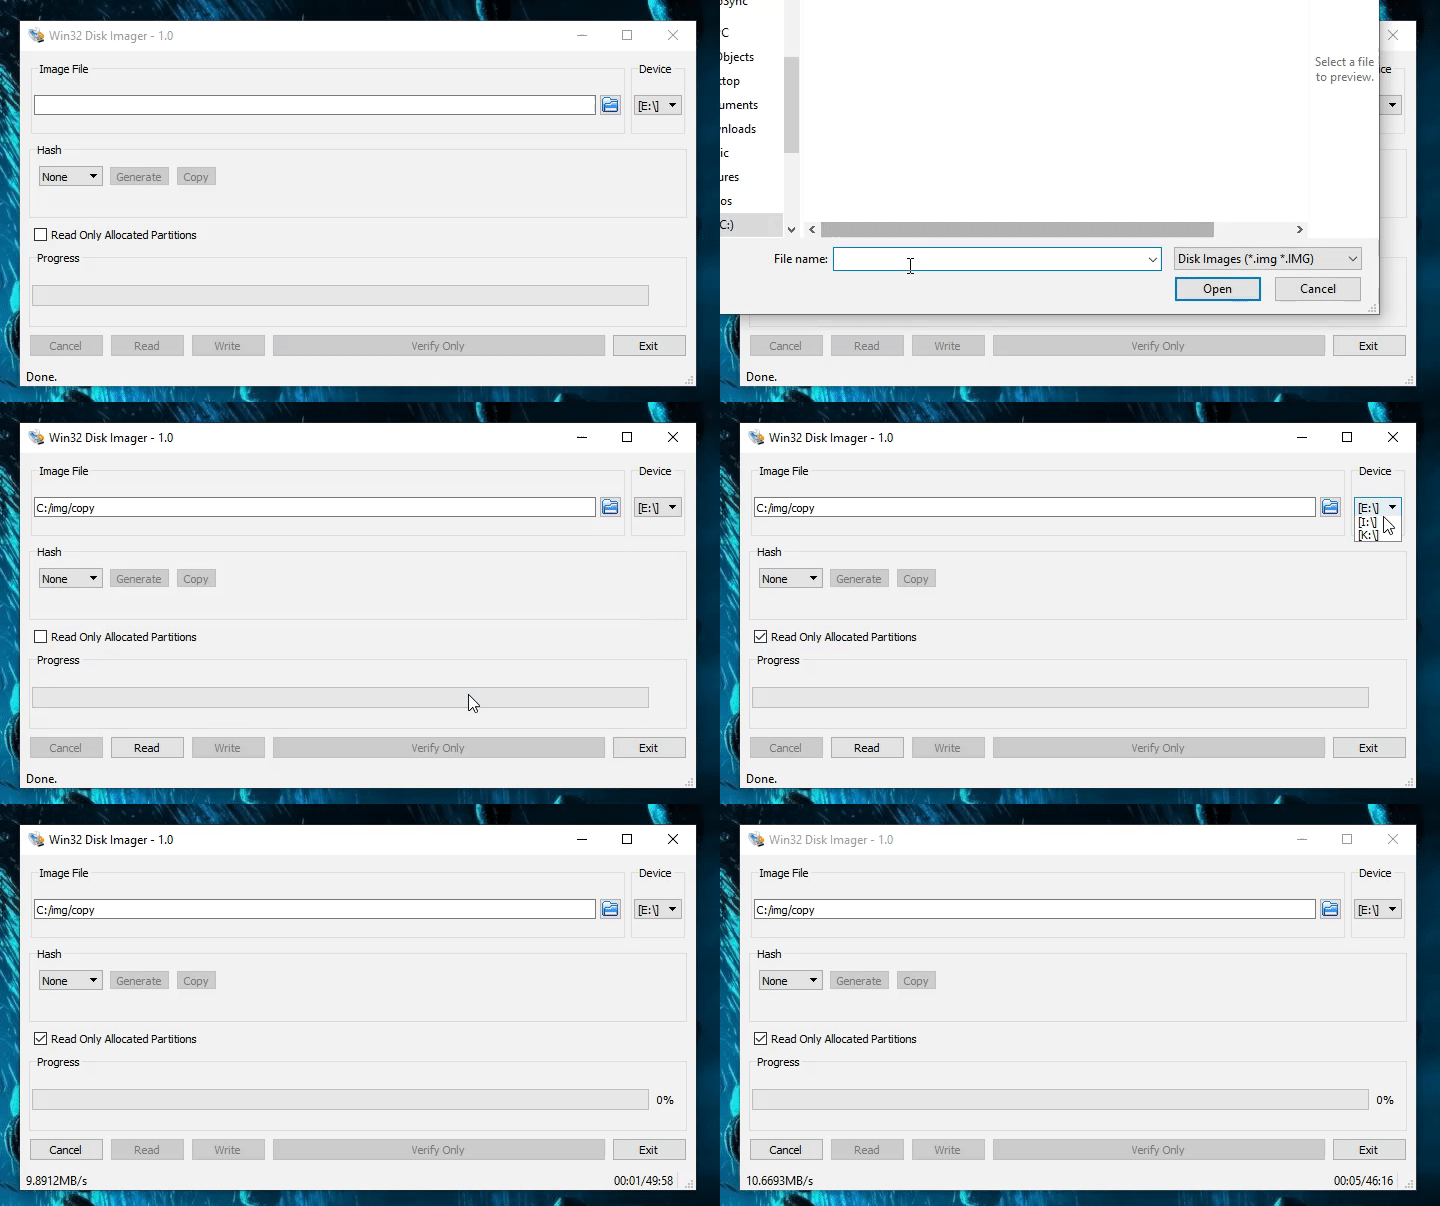
First we want to choose where to save our .img file, in my example I store it in C:\img\copy.img
Next we will choose the SD card we wish to read, in my case it’s the E: drive.
Another key item to check is “Read only allocated partitions”, this will read only the in use data on the card and drastically reduce the creation time and file size of our .img backup file.
Once we’ve chosen our destination, where our SD card is and the optional Read Only Allocated Partitions, we can then click the “Read” button at the bottom. This will start the backup process, once it finishes you will now have a bit by bit copy of your Raspberry Pi disk to save for reinstall, cloning or just a general backup of your effort.

If you wish to flash this image to an SD card, or any other image / .img file to an SD card, check out our tutorial on flashing an image to SD.

Like many many people, if I try to create an image of my SD card I get:
“An error occurred when attempting to get a handle on the volume. Error 5: Access is denied”
Be sure to close any instances of Windows explorer. Sometimes mine would be scanning the drive from my AV software or otherwise, and I would get the same error