
I have done several upgrades to my new Ender 3 since getting it this year.
I figured I would share my progress so far.
First upgrades I printed were filament guides, these help push the filament out so it will feed abit better while printing.
Top guide
https://www.thingiverse.com/thing:2917932
Lower guide
https://www.thingiverse.com/thing:2920344
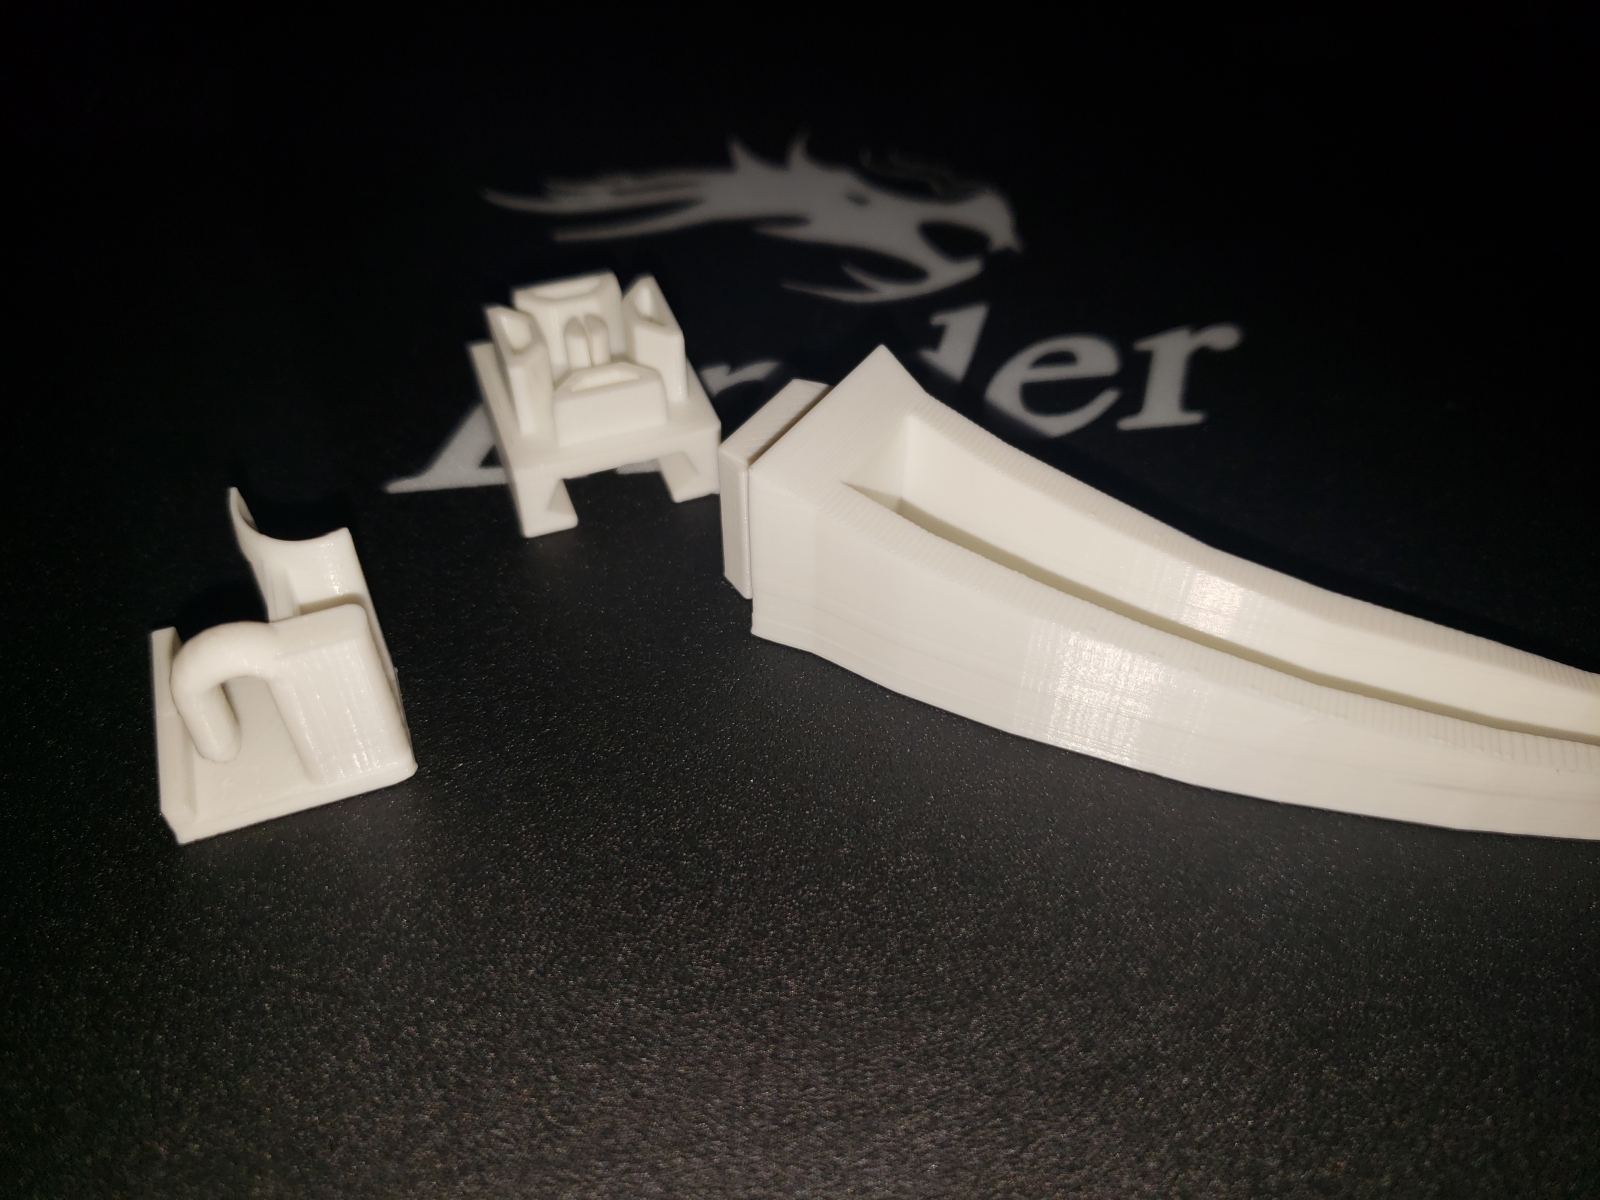
I then followed up with an extruder knob to help when feeding in new filament.
https://www.thingiverse.com/thing:3005278
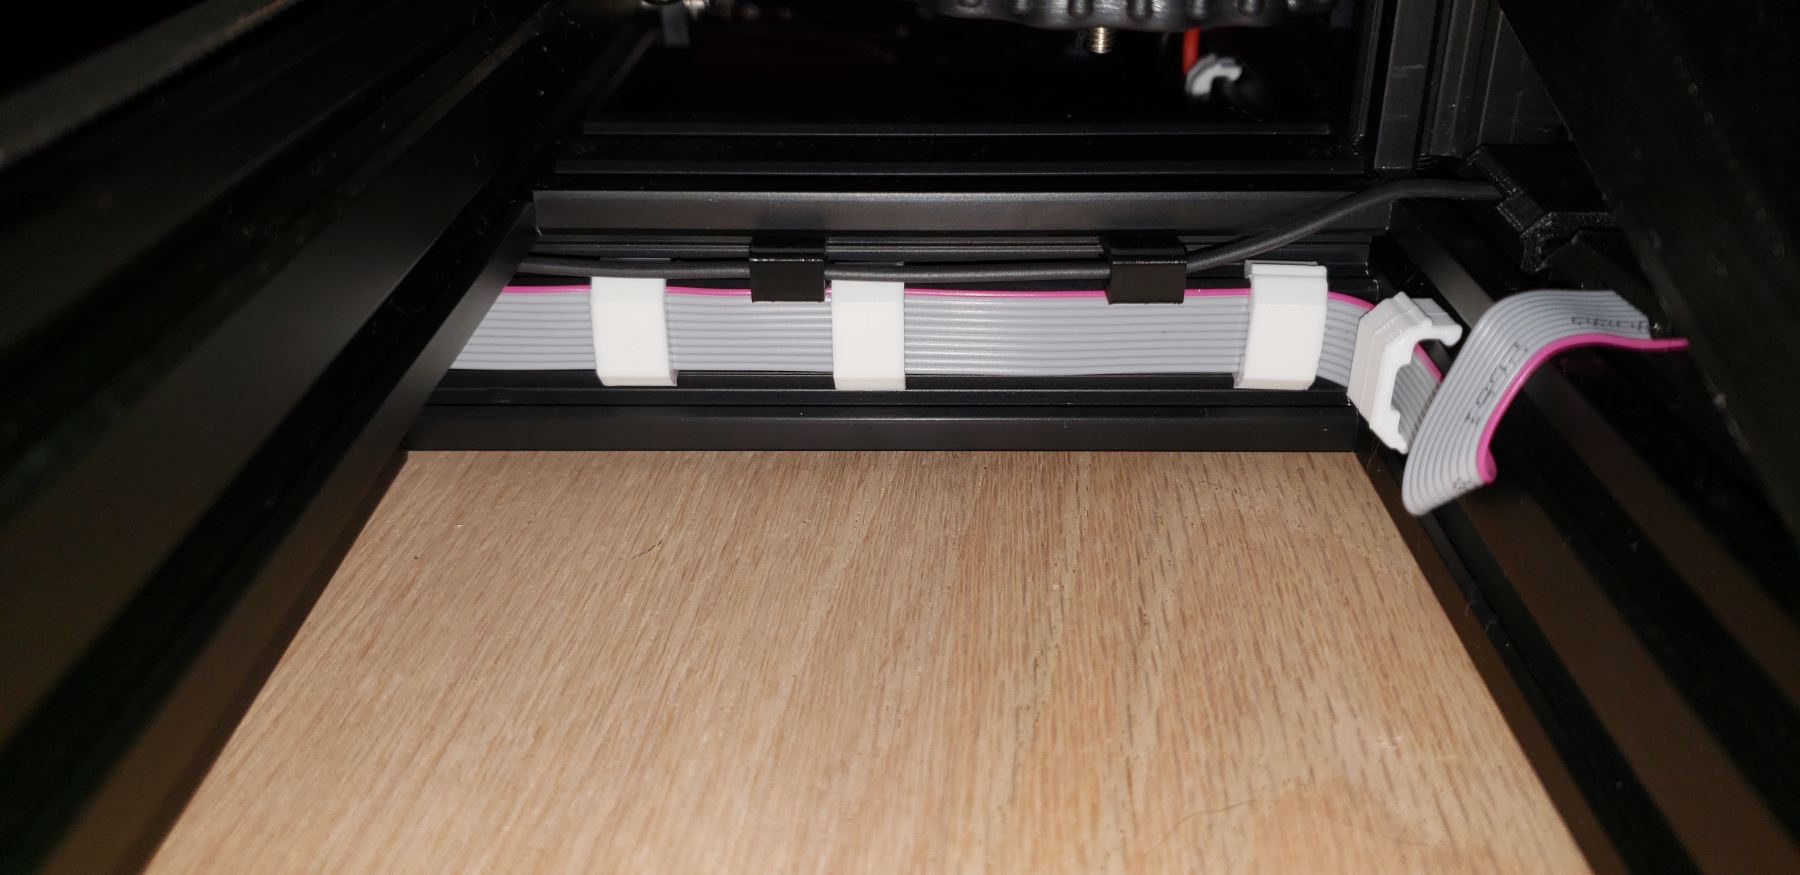
For cable management, I settled on these 2 sets of cable clips for the Ender 3.
https://www.thingiverse.com/thing:2960375
https://www.thingiverse.com/thing:2981386
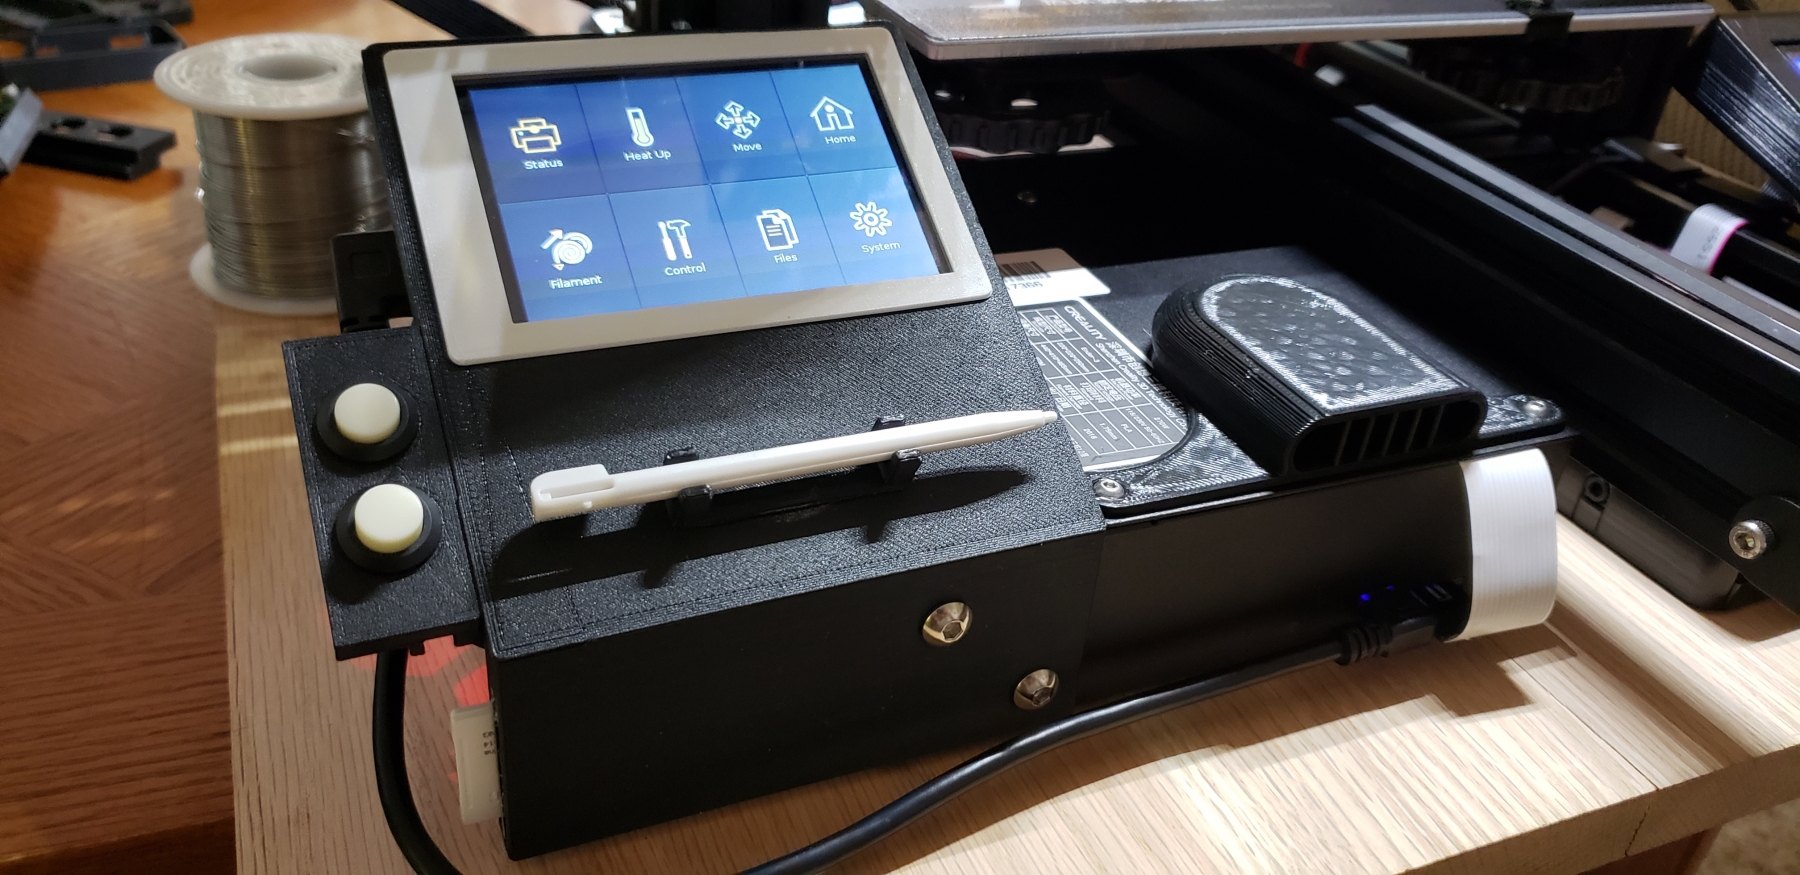
For the remaining basic upgrades, I also printed an LCD back cover for the stock control panel. This one allows use of the factory screws.
https://www.thingiverse.com/thing:3092176
And lastly the controller fan cover.
https://www.thingiverse.com/thing:2935204
Advanced Upgrades
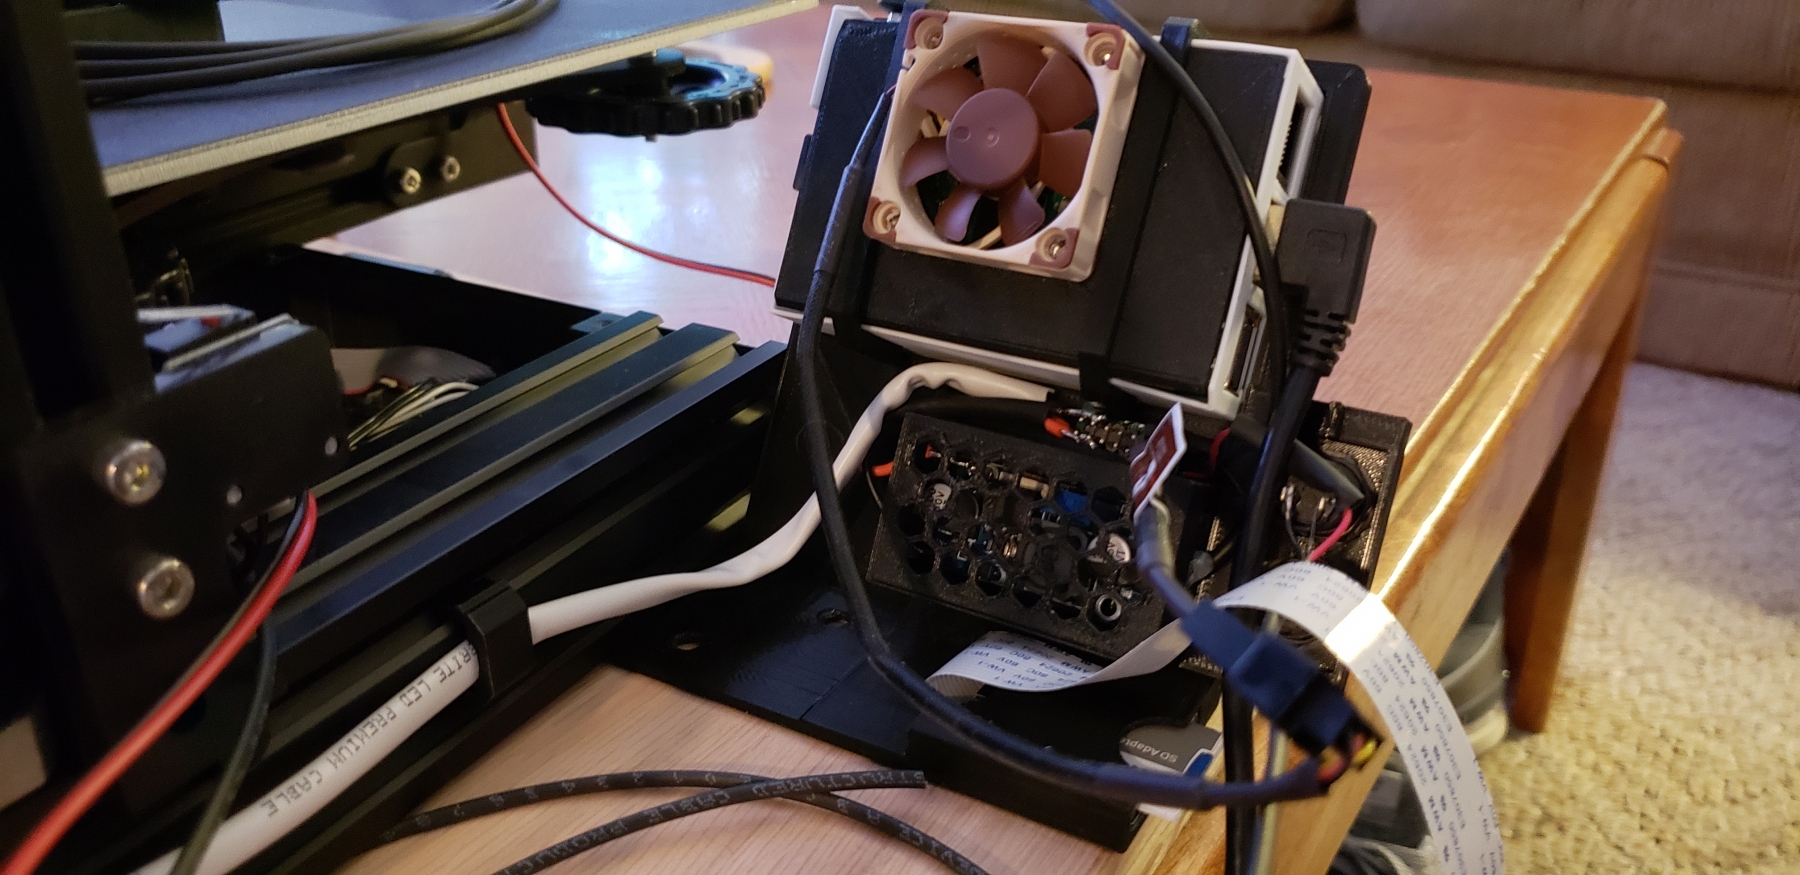
I decided to setup OctoPrint for use with my printer, this originally started out to be a "great way to use a spare raspberry pi" I had sitting around, then quickly spiraled out of control.
I started off with a spare Raspberry Pi B+ I had sitting around for the past several years, and a Pi camera version 1.2, printing the following case to go along with it. Needless to say I've since upgraded to a Raspberry Pi 3 B+
https://www.thingiverse.com/thing:3030160
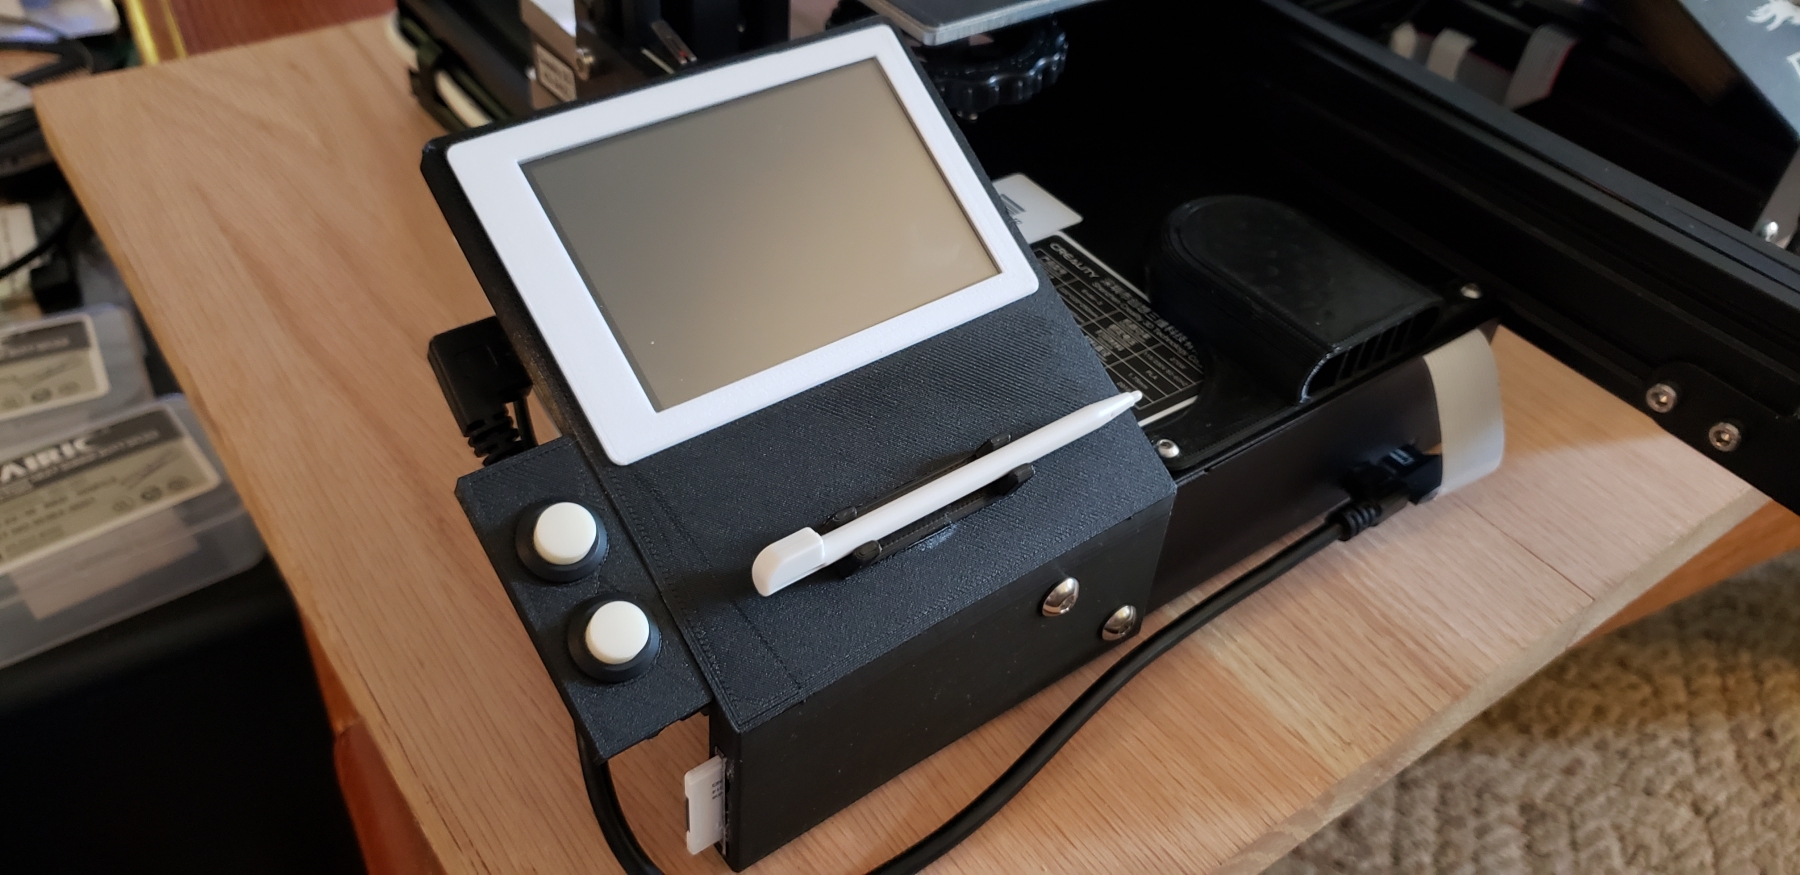
I opted for the version with the 40mm fan mount in the rear as I was pushing the Pi B+ abit hard once I started adding the touch screen and camera.
For the touch screen I settled with the following 3.5inch LCD touch screen.
3.5 inch Touch screen LCD
Here is a full write up for installing OctoPi with OctoPrint for the Raspberry Pi, as well as Setting up OctoPrint-TFT.
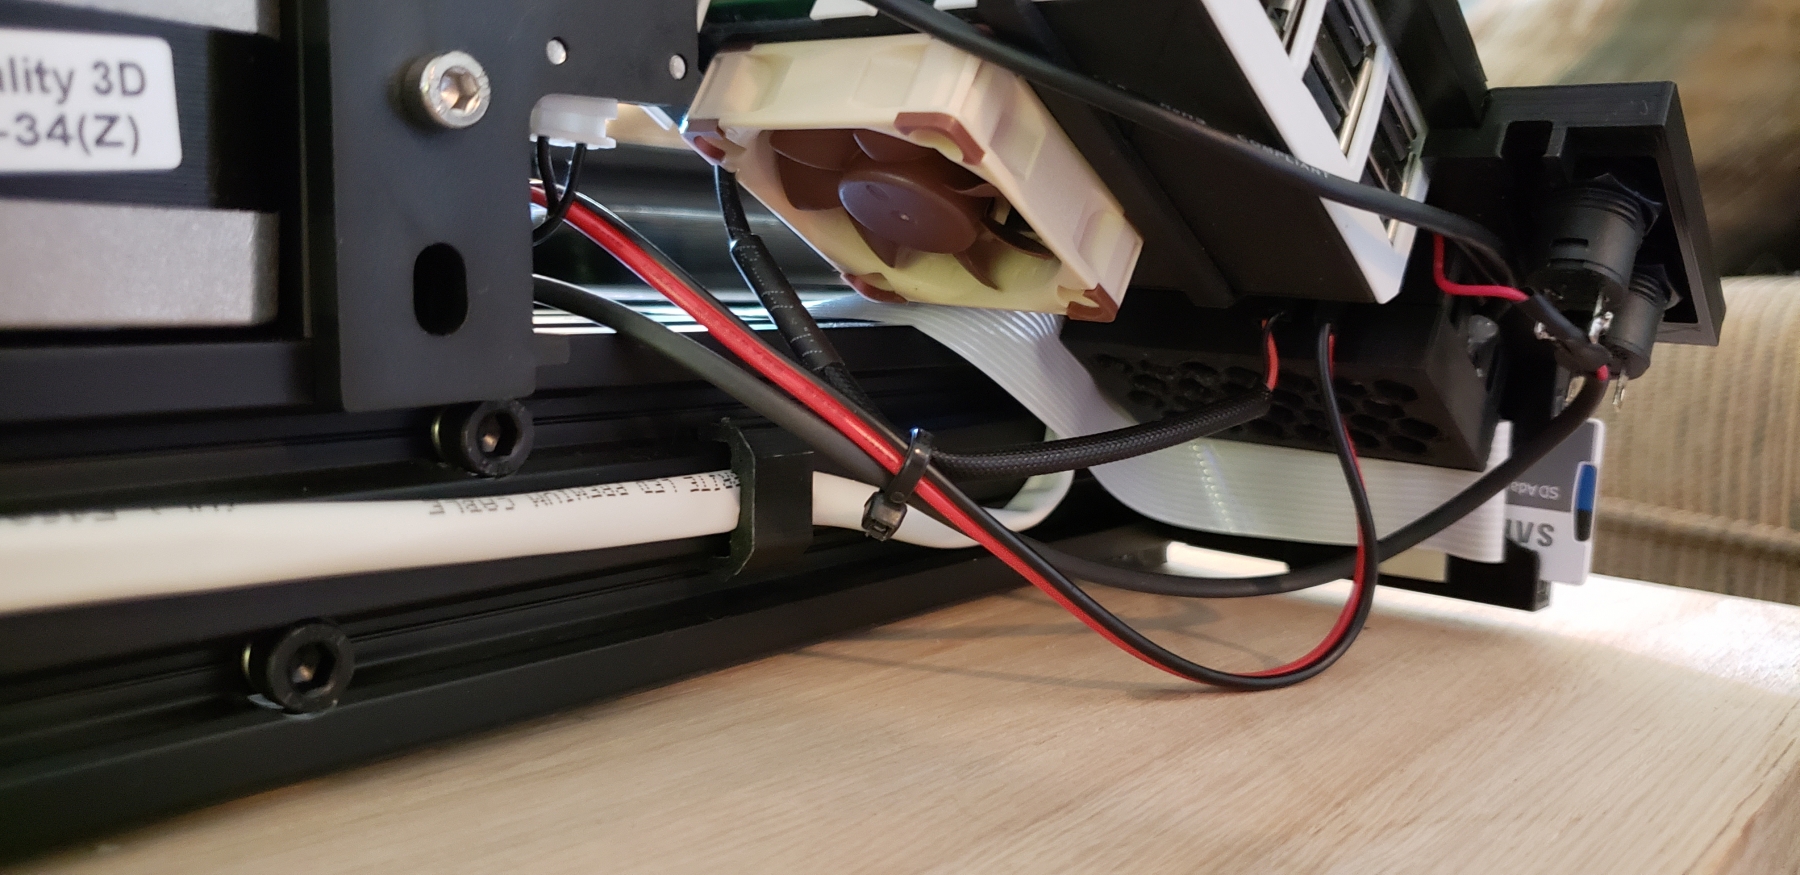
And I ordered 2 Noctua fans, 1 for the print head work I would be doing and 1 for the Raspberry Pi itself.
40mm Noctua Fan - 12v
To power everything, I needed 12v and 5v, so I opted for the easy and quick way of using 2 buck converters to drop the 24v supply down to 12v and then 5v. Yet in retrospect, it would have been possibly easier to pull 5v from the Ender 3 controller board to power the Raspberry Pi, though I am not sure it could handle the Pi, LCD and Camera.
I used the following Buck converters, the have an adjustable potentiameter allowing you to step down to the desired voltage.
DC-DC Buck converter
Feeding power to this, is a split of the main power connection going into the power supply with the following adapter.
Y-Splitter power adapter
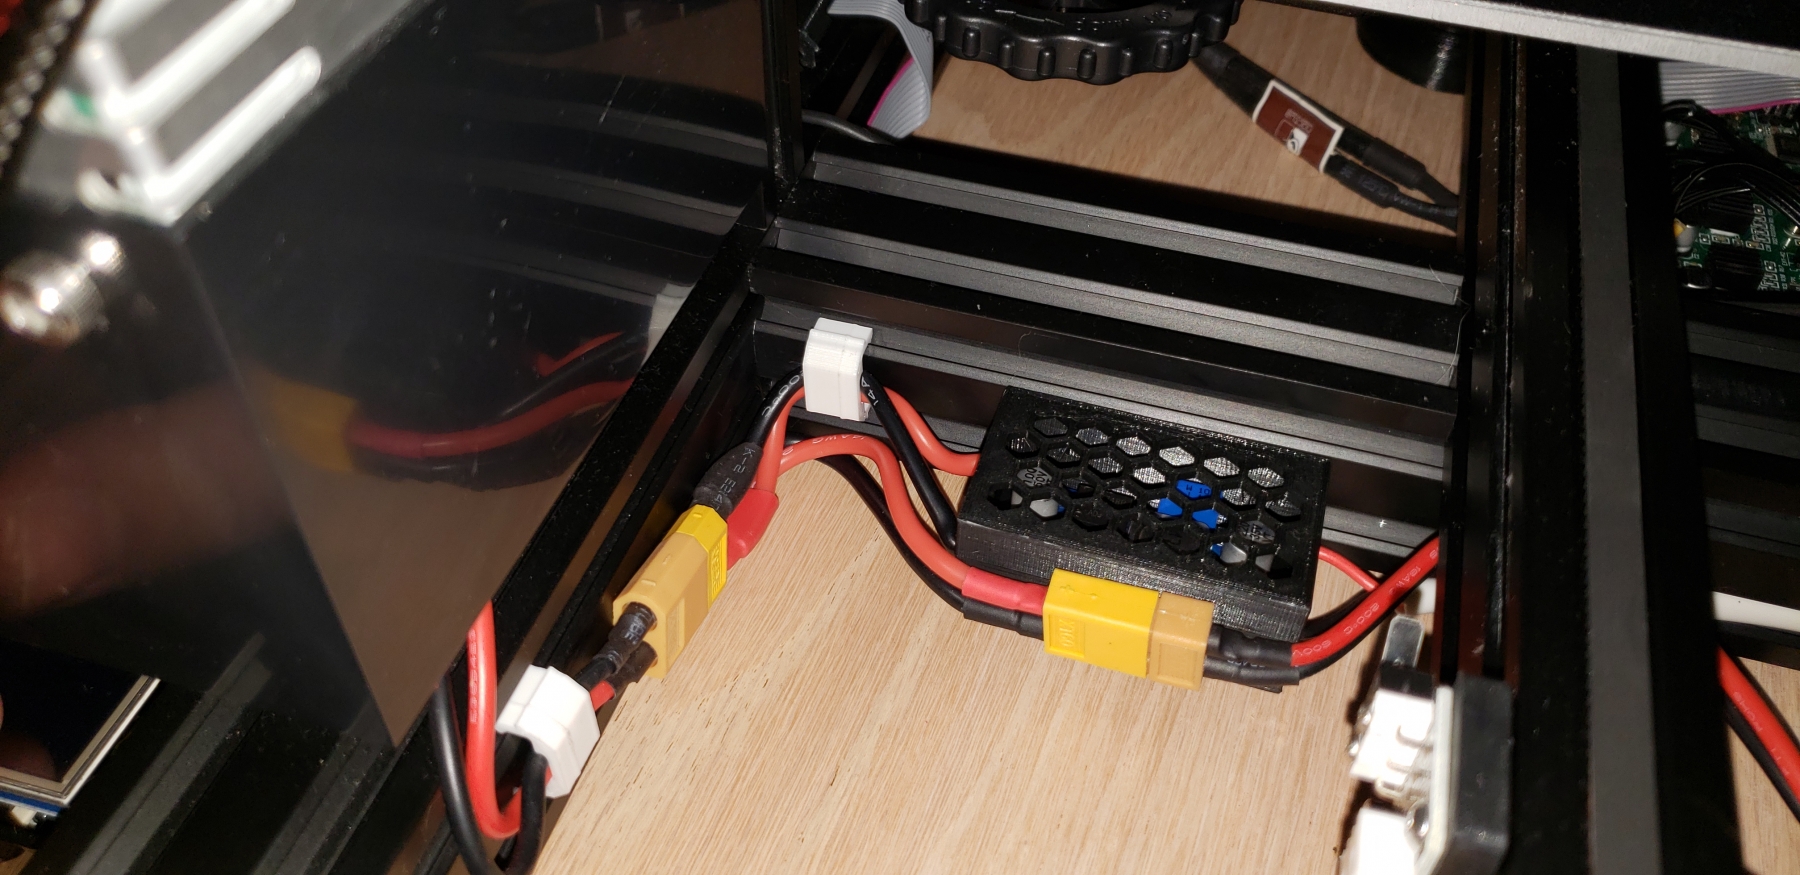
I then printed 2 of the following Buck Converter cases for mount to my Ender 3, one with rail mounts and one with out.
https://www.thingiverse.com/thing:3164882
The first buck converter gets power from the power supply Y adapter and drops power down to 12v and is routed to the left side of the printer.
This 12v line is then splint into several feeds.
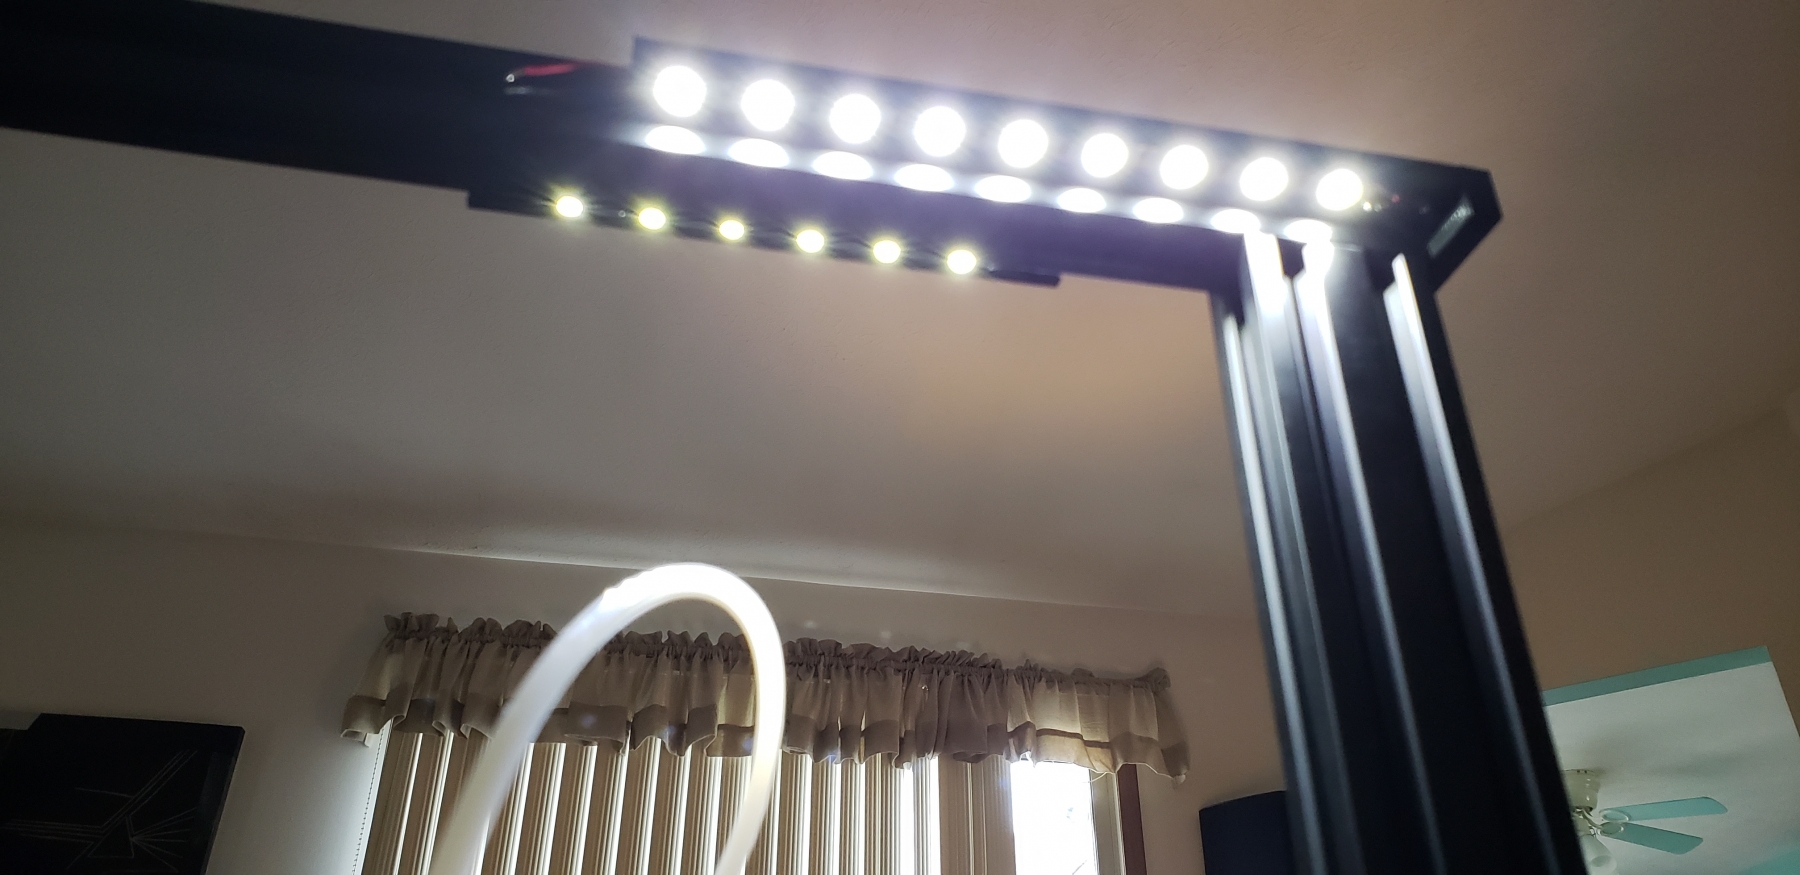
12v White LEDs are the top of the printer frame.
12v 40mm fan on the print head
12v 40mm fan behind the Raspberry Pi
12v into the second buck converter and dropped down to 5v to run the Raspberry Pi
For the 12v White LEDs, I used the following parts;
12v White LEDs
12v White LEDs - Non Water Proof
LED frame mounts
https://www.thingiverse.com/thing:3272248
12mm push buttons
12mm Push Buttons
And a 2 button mount I made to secure next to the Raspberry Pi Touch Screen
https://www.thingiverse.com/thing:3333594
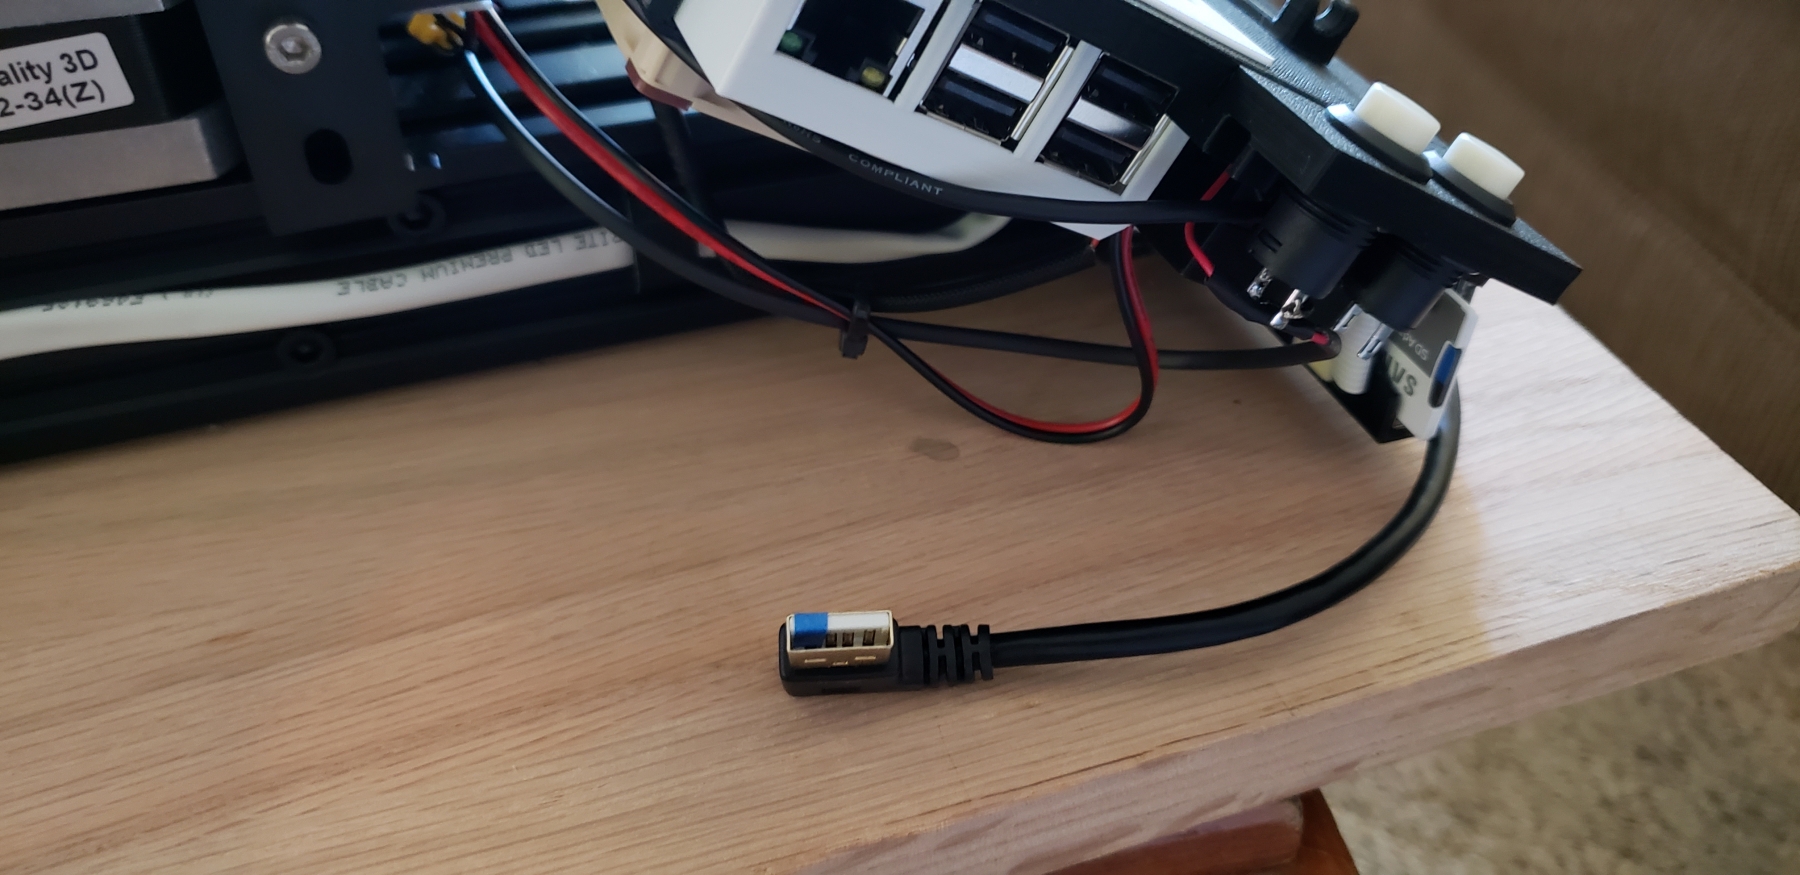
Now that I have a 5v line coming from buck converter #2 that is now mounted behind the Raspberry Pi, I took that 5v line and connected it to the Pi via a micro USB cable I cut up for this purpose.
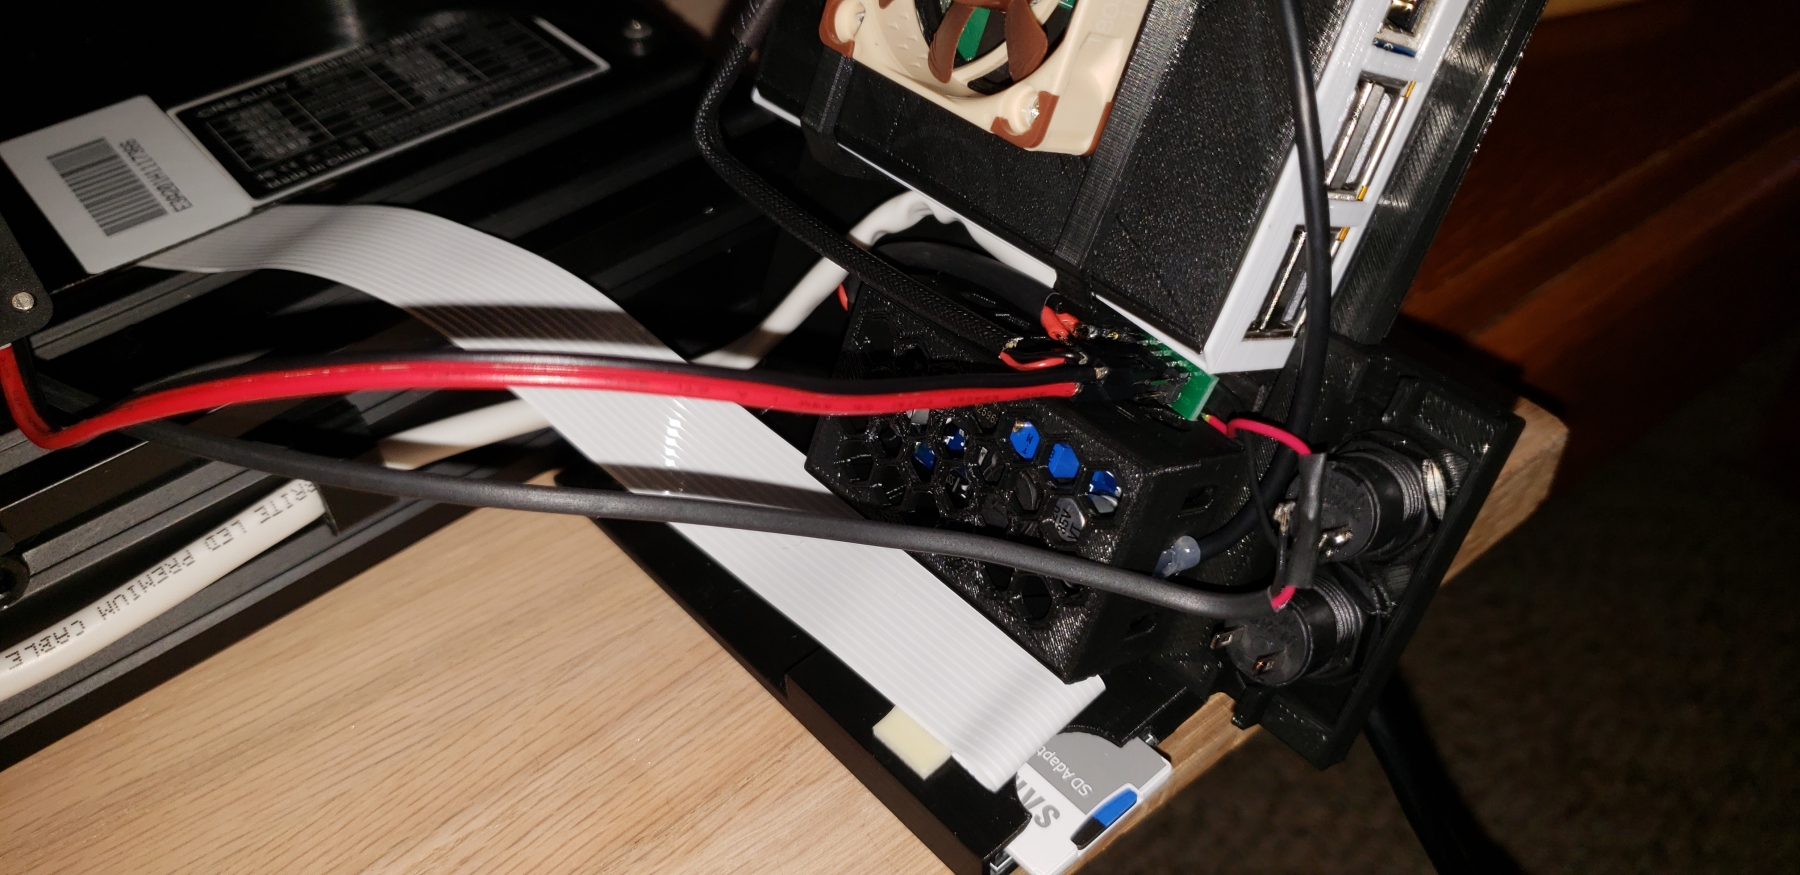
Again for the Pi case and mount, I settled on the case version with the SD card adapter holder and then ordered the following Micro SD to SD card adapter.
MicroSD to SD card adapter
To mount the SD card adapter in the printed Pi case, I had to remove the plastic case from around the SD card adapter, and then I used a small drop of glue to hold it in place.
I also ordered a 12 inch angled micro USB to USB cord to connect the Raspberry Pi to the printer, placing a small piece of tape over the 5v+ pin on the USB cable going into the Pi to avoid reverse voltage being fed into the printer.
12inch angled Micro USB to USB cable
One of the last items I picked up for this build was a longer ribbon cable for the camera, I found an article that mentioned the following cable and ordered it myself. Though I have yet to connect it and verify its not over sized.
610mm Raspebrry Pi Camera Ribbon Cable
Once everything was printed out and wired up, I setup OctoPrint on the Raspberry Pi, I have a write up of the process that can be found below.
http://www.crackedconsole.com/community/3-general/wip-installing-and-configuring-octopi-octoprint-for-raspberry-pi-to-control-your-3d-printer/#post-1
I have several more upgrades underway, as I finish each up I will post their progress. Up next is the Hero Me fan mod, with dual 5015 fans.
https://www.youtube.com/watch?v=y9P8JSu0wBk
I have a video I made showing how everything for the Raspberry Pi wiring, terrible quality, I'm new to all of this so forgive me.
For the Hero Me fan mod, I ended up going with the Dual 5015 Remix of it, using 2 24volt 5015 fans and 1 Notcua 40mm fan.
https://www.thingiverse.com/thing:3182917
I was able to run an existing 12v line I had (from my prior Buck converter upgrades above) to the print head through the flex loom to power the 12v 40mm fan.
https://www.youtube.com/watch?v=hHQKr-LgvfI
I have also swapped out the springs for some upgraded, more rigid springs
UXCell 8mm OD 20mm Light Load Springs
https://www.youtube.com/watch?v=vmKm9IxFBDA
To control the power of my printer via Octoprint, I picked up a 5volt relay and used PSU Control. A full write up can be found in our forums.
Controlling the power of your printer via Octoprint
https://www.youtube.com/watch?v=0-Ol6Yvf0fg
Another item I have yet to utilize is my Glass bed, sadly it still sits in the box waiting for its day of glory.
I've also been adding a collection of videos and tutorials to the Creality General Chat forums.
